5 years ago we had to move our eldest out of her baby bed, so that her little sister could have it, so that the new baby on the way could take the crib from the little sister. Follow that?
It took a while to convince her that it was necessary, but in the end she was happy to make the switch without too many tears. I guess I must just be an awesome father, or maybe it was the lollipops I bribed her with…
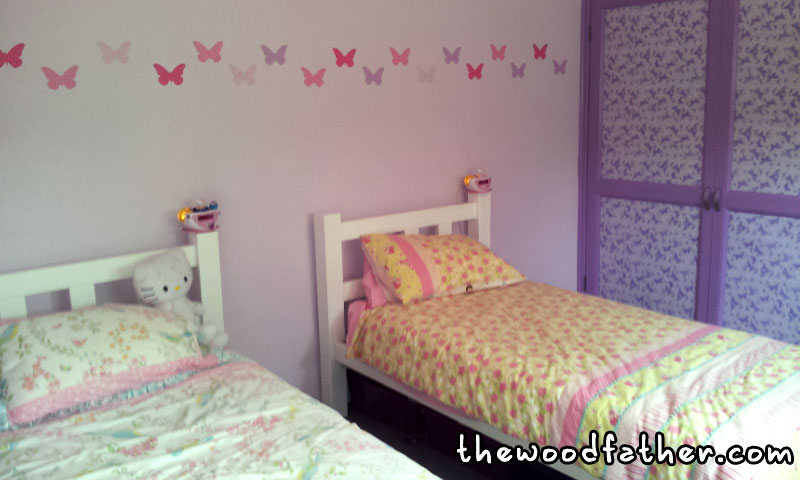
Either way, we needed a new bed, preferably two the same so they would match in the girls bedroom. My wife and I did look around at a few stores for them, but everything we saw was either really flimsy looking or just too expensive, (we did have a new bubby on the way and things were a bit tighter back then too.) So I decided it might be good fun and cheaper to build my own beds.
After looking at lots of plans online I started sketching up designs. The only constraints I was given by the head designer were:
- That it was to be painted white;
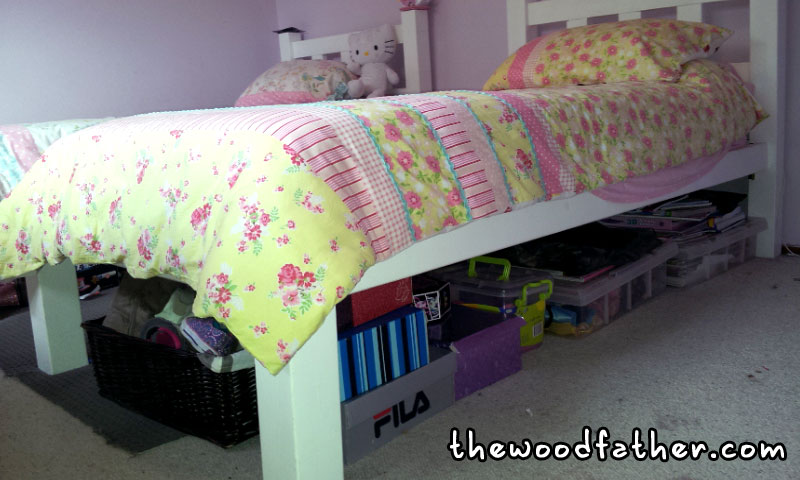
- Allowed for plenty of storage underneath the bed;
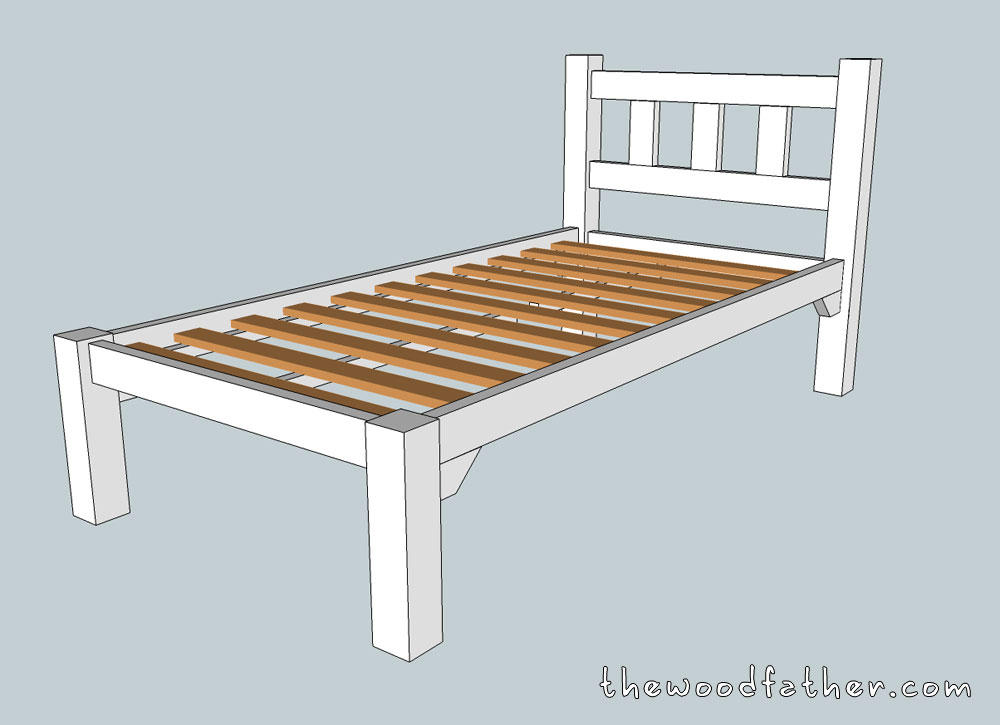
- Had a low footboard so the quilt on top would not have to be tucked between mattress and footboard, instead it would hang over the end.
I started mocking up some designs and my wife and I agreed on one fairly quickly, it’s nice and simple, basic but solid.
I designed the beds to be built with off the shelf timber, literally 2×4’s and standard 90mm x 90mm posts.
The total cost of each bed was around $65, including hardware. Originally I thought I would bolt the frame together, but then I found an old box of bed hooks in my local hardware store, I was rapt, they were only around $6 a pack. To get a similar product now is around $17, so still affordable. These hooks mean that the beds can be knocked down and setup somewhere else, with no loss in strength, or any special tools required. They are exceedingly simply to install.
This was one of the first big furniture projects I ever completed. I remember that I used dowels to connect the uprights in the head board together, I thought I was such an expert craftsman at the time. I was so proud of myself for not simply glueing and screwing it together. If I was to rebuild these today I would replace the dowels with tenons instead as that would make it a lot stronger. I think it would also be stronger to mirror the headboard design in the footboard, two rails would help it keep its shape a lot better.

I was rapt when they were finished and after 5 years of kids jumping and climbing on them, the beds have held up fantastically well. I did had to repair one of the footboards after a child barrelled down the hallway, jumped but slipped and then kicked the leg out from underneath, but after gluing and clamping it in place, I haven’t had to touch either of them again.
It’s a surprisingly simple build as well, there really isn’t much in a bed! Building is as simple as make the headboard, make the footboard, then connect them with a couple of 2×4’s and the bed brackets. Easily a weekend build no matter your skill level. I built both of them with a battery drill and a circular saw, you certainly don’t need anything fancy to get this job done.
Click here to download the sketchup model for free.
(It’s in a compressed .7z file, your computer knows how to open it already.)

I’m actually going to be getting rid of these beds soon! The carpeting in the girls room is very old and unattractive, it needs to be replaced. Fortunately my builder brother in law has a job replacing the floors in an entire house coming up. The house currently has floating timber floors installed. We should be able to rip them out of there, and then reuse them for a couple of rooms in my house. Winning! Also now that my girls are older we can trust them a bit more – we think it’s time for bunk beds. That will free up a lot of floor space in their room and will be a fun build too. Looking forward to getting stuck into that.