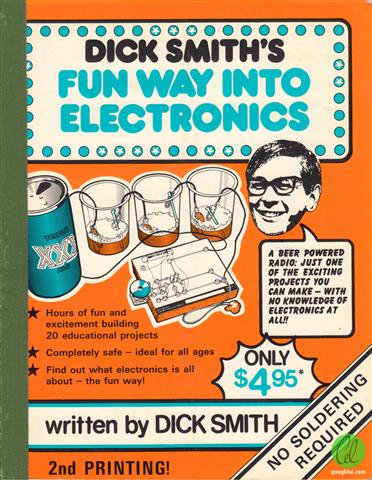
When I was a child, I used to love playing with electronics. I received my first hobby kit (Dick Smith’s Funway into Electronics) when I was about 7 or 8, and very excitedly bought my first soldering iron when I was about 9. I thought it was amazing, you can put all these little metal parts together and create a radio or a siren or a game or…well, a beer powered radio…
I kept up with it through high school, but after that I moved away from building and repairing hardware and focused more on software. I’ve made little mods to games and toys, but nothing major for a long time. I’m starting to have more of an interest in it again though, I have a few projects planned that will require a bit of electronic work, and I want to be organized when I do that. Also, I’d really like my kids to understand the basics of hobby electronics at least.
So I built myself a small chest to store some tools in. There’s nothing overly amazing about the build, it’s simply a plywood box which has two hinged doors and a 7cm deep drawer. It also has a flat top, with walls on three sides. This top serves two purposes. One, it will sit motionless on my bench 95% of the time so I want to be able to stack things on top. And two, when working on projects I’d like to keep parts within easy reach and not leave them on a cluttered benchtop. If I store parts on top, I’ll always know where things are. The walls mean that parts won’t roll away.
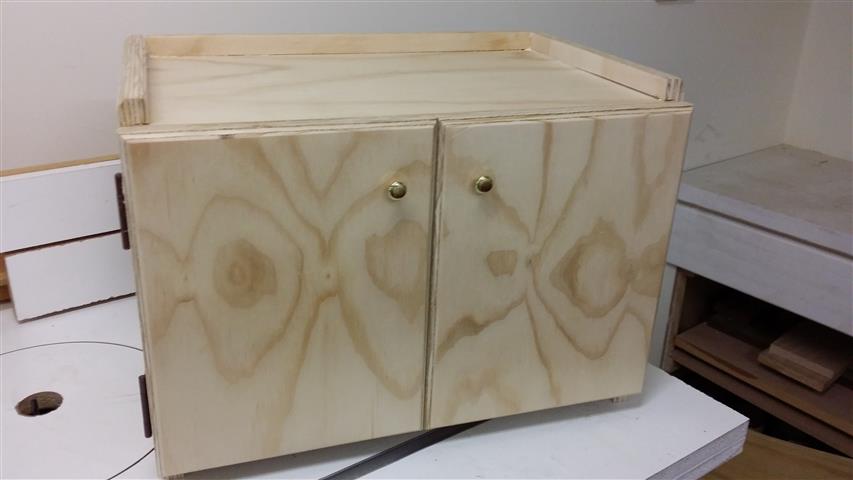
I spent a grand total of $0 on this project. The plywood, hinges and cabinet pulls are all scrounged from my shop. I was going to put an oil based varnish over the wood to protect it, but when I opened the can up I found that it had congealed into a big lump of lard… So hunting around a bit I found a can of wax which I have never used before, and honestly don’t remember buying. Feast Watson Mastertouch Wax if you’re interested.
I wasn’t certain about using it, but after rubbing it in, waiting 15 minutes and then buffing it out, I am ecstatic with the result. I sanded the box to 220 first, and was happy with the feel. After buffing out the wax though, it’s just amazing. It almost feels like a metal sheet, the wax makes your fingers glide across the wood. And it smells like lemon which makes the whole workshop seem like it’s just been cleaned. Very happy with the wax and can’t wait to use it again on a nicer project.

This isn’t a project that I think many people will be after, but the simple style of it may suit some. You can obviously use it to store anything.
I’ll post a sketchup plan shortly, I just need to modify it to match what I built. Originally I was going to have two smaller drawers…but I sort of forgot about that when I was building it. I was so excited to glue it up, I didn’t realise that I hadn’t cut the grooves for the drawers to slide in. I think it turned out to be a blessing though, one deep drawer is better than 2 very shallow ones.
I do plan on cutting a hole in the back so I can push the solder station power cord through, but I’m holding off on that for now. I want to see how I use it first, I might find it more useful to put the station on the other side or something like that, so I’ll let it go for the moment.
Being pressed for time, I decided to try a different style of video too. This is much faster and easier for me to edit, but I’m not sure how watchable it is.
As always, let me know what you think.
Thanks. Appreciate it. Looking forward to it, as I’m sure many others are too.
Just wondering when you will be having the sketchup plan available. This looks like a nice project to do, but I’m not the type of woodworker that can build things from sight, I require, no need, visual pictures and plans to follow, with dimensions, etc.
Thanks.
It’s still on my to do list unfortunately Stafford, I’ll aim to get on it over the next week or two.
Comments are closed.