As I did after the first part of the video was released, I thought I’d write up some more info and talk about how I built my workbench, and what I would do differently going forward.
If you haven’t seen the Workbench build videos yet, part one is here, and part two is here.
Go ahead and watch them, I’ll wait. 🙂
Ok, ready? Let’s go!
Trimming the Slab to size
On what I did:
 |
 |
 |
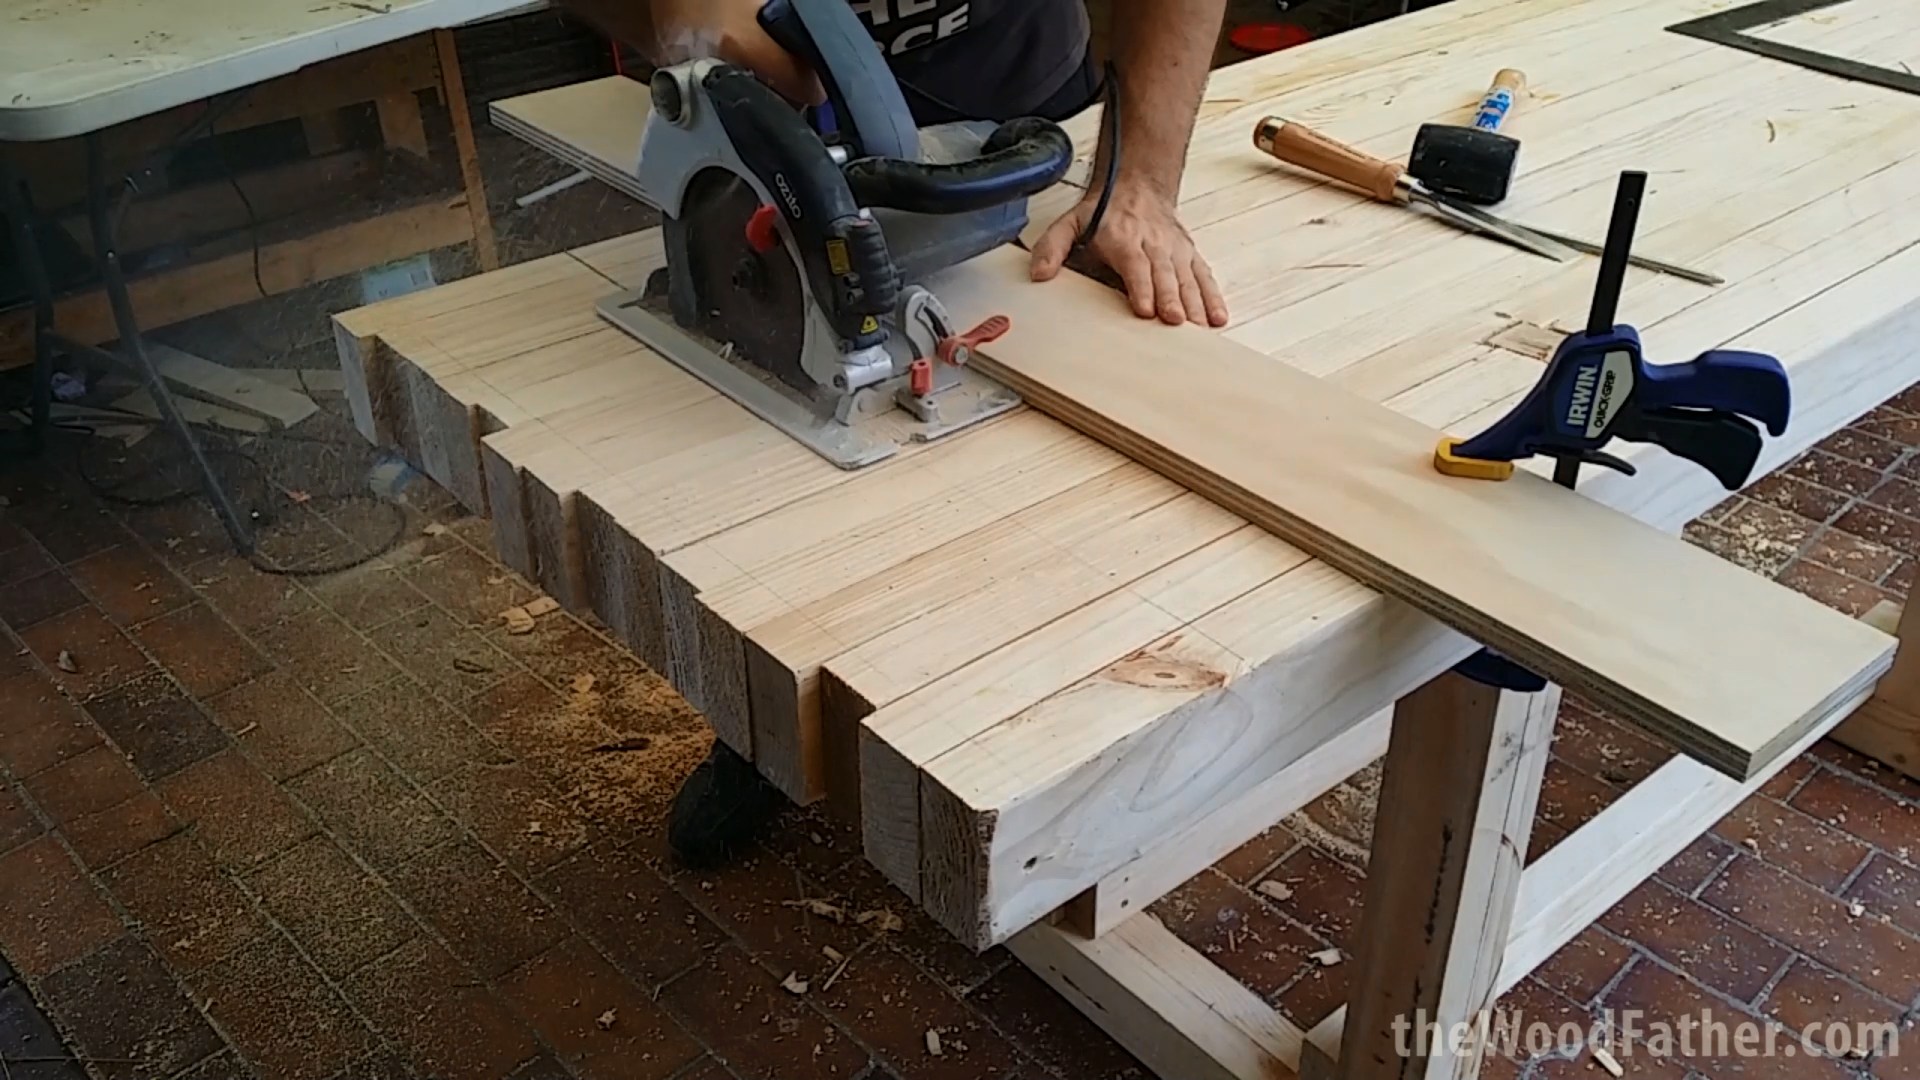
My circular saw isn’t big enough to cut right through 85mm timber, so I had a problem. I figured I could cut it once on each side and have the cuts meet up in the middle, but I was pretty certain that one of the cuts would be off slightly which would give me a messy and angled edge to clean up.
So instead I made 2 or 3 cuts with the circ saw until it was at its full depth of cut, and then finished the cut off with the handsaw. It came out smoother than I expected and a bit of light sanding brought both ends up to an acceptable standard.
However, when gluing up the slab I wasn’t careful enough with my screw placement, all the screws should have been within 10 cm of the end. Clearly I didn’t do this part properly as you can see I trim more than 10cm off of the slab and of course, I manage to cut right through one of the screws.
The blade was fine, it really just ended up pushing the saw to the side ever so slightly. I ended up beating the screw with a hammer to flatten it into the wood, and then sanded it for a little bit.
I was always going to have a hardwood cap over one end of the bench, this screw sticking out simply meant that this would be the side which received the cap.
If I was to do it over:
It was fine cutting it this way, so I would use this method again, however it goes without saying that I will ensure I know where my screws are before cutting in the future.
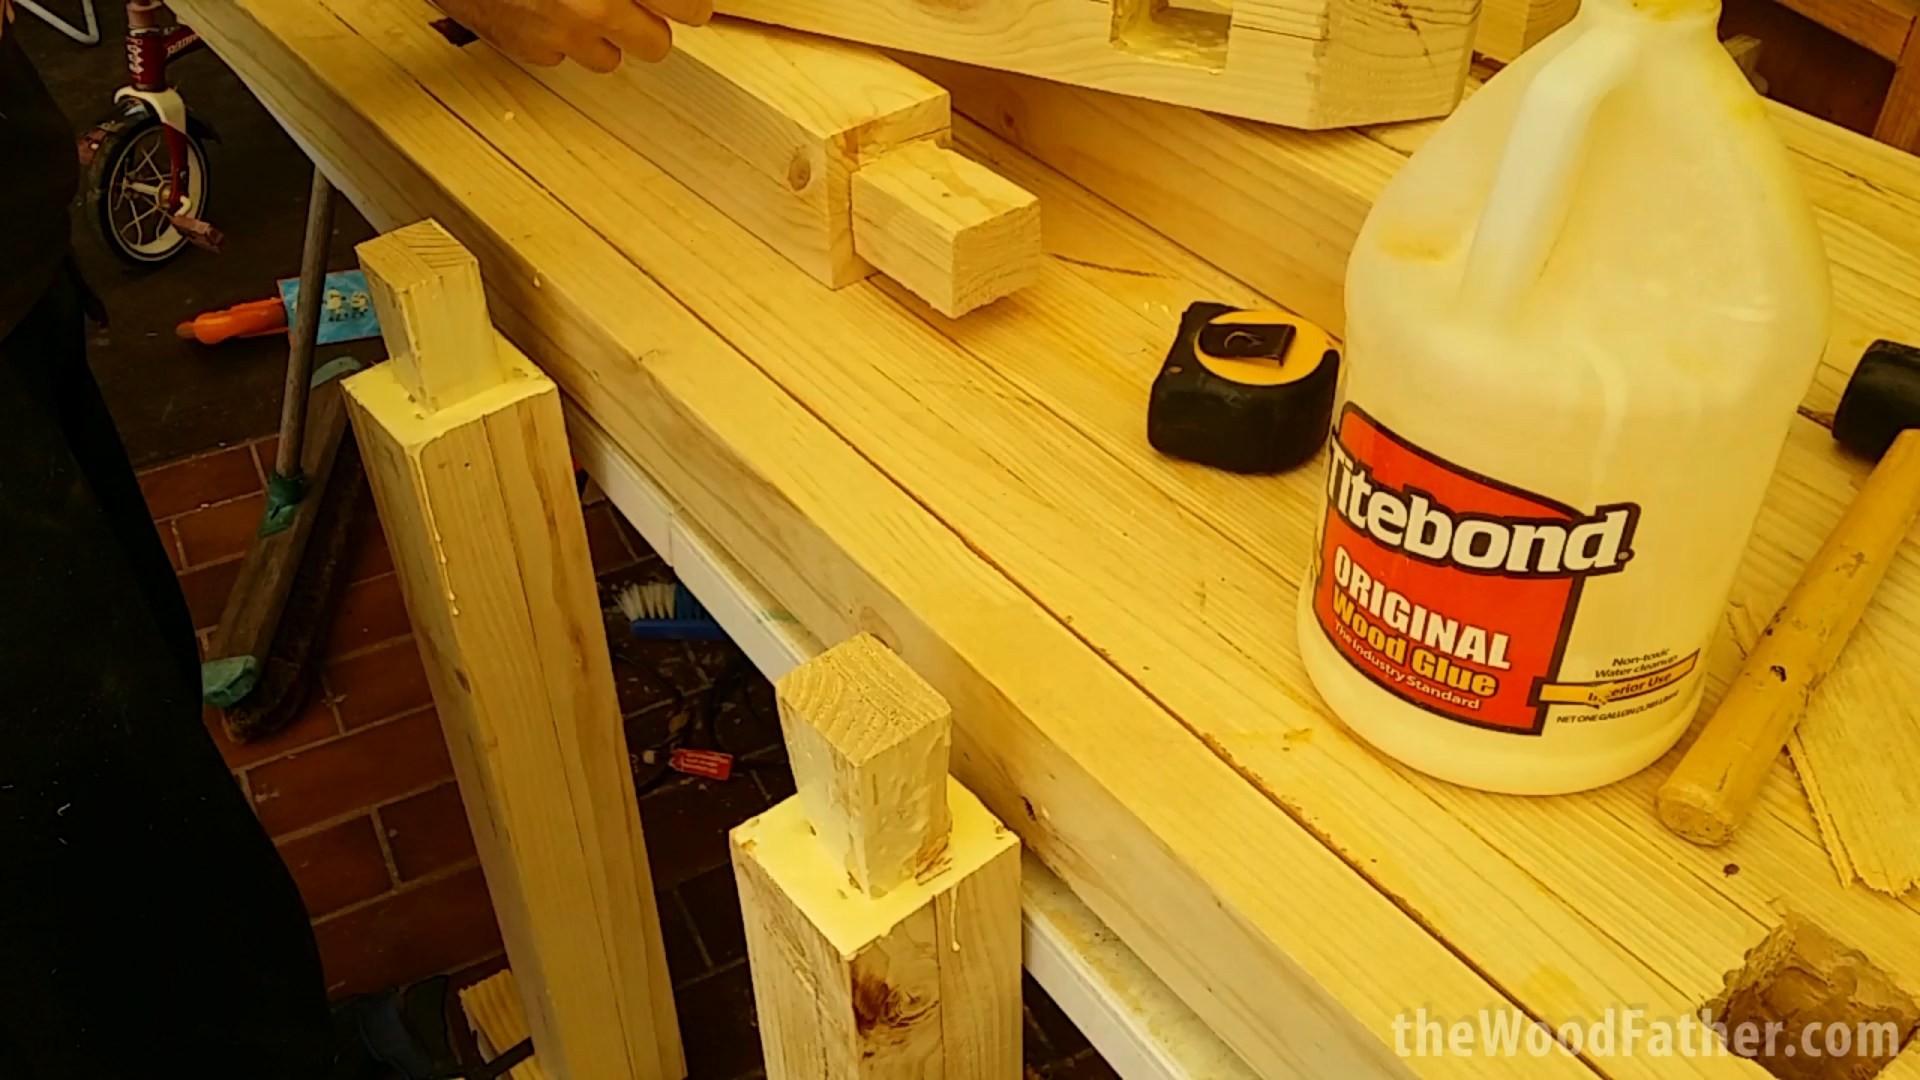
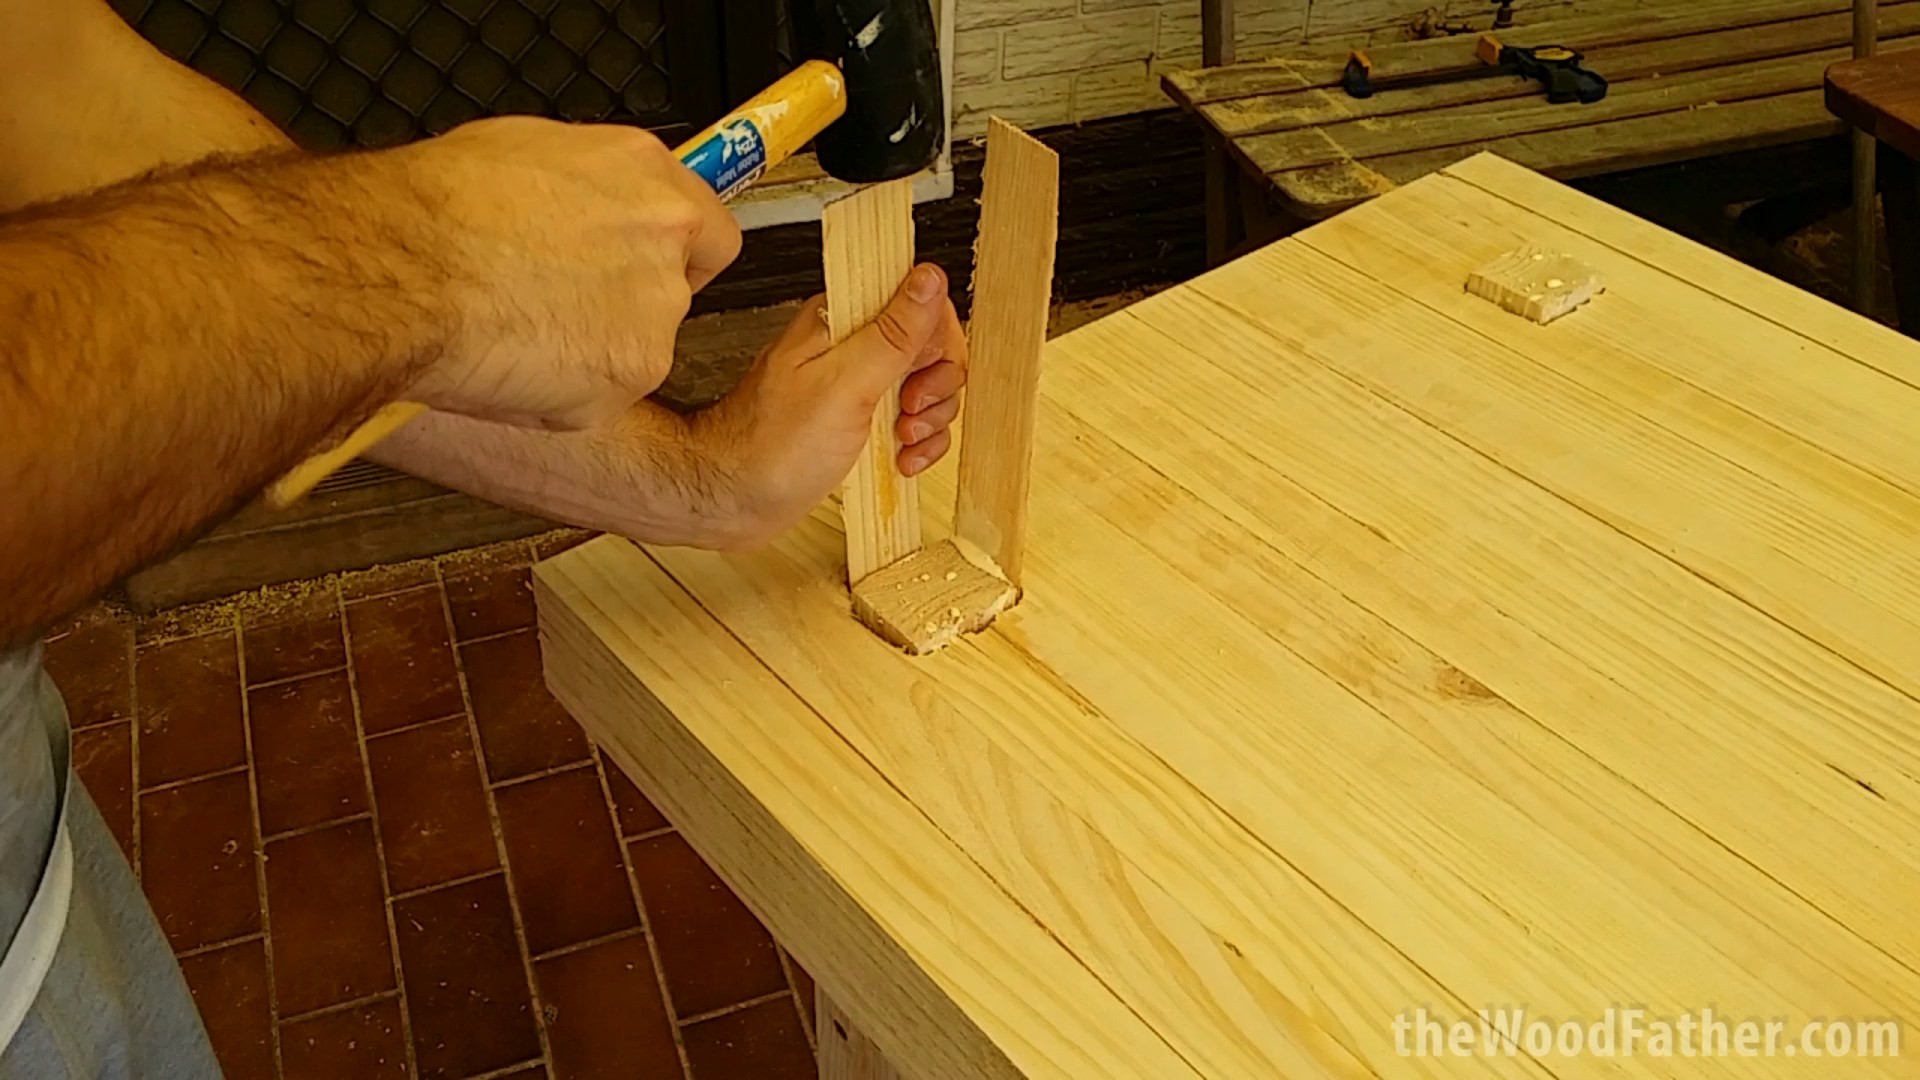
Gluing up the Legs
On what I did:
 |
 |
Honestly, and you can see in the video, this was a basic glue up. I smothered the joints with glue, whacked them together, and then forced in wedges wherever I could find a gap to do so. The part where the tenon pokes through didn’t look too pretty, but seeing as that part is on the ground and can’t be seen, I was cool with it.
I also did clamp the legs before gluing to ensure they were straight and square.
If I was to do it over:
A glue up is a glue up. Think it through, have your gear ready to go and get into it. Nothing too crazy here.
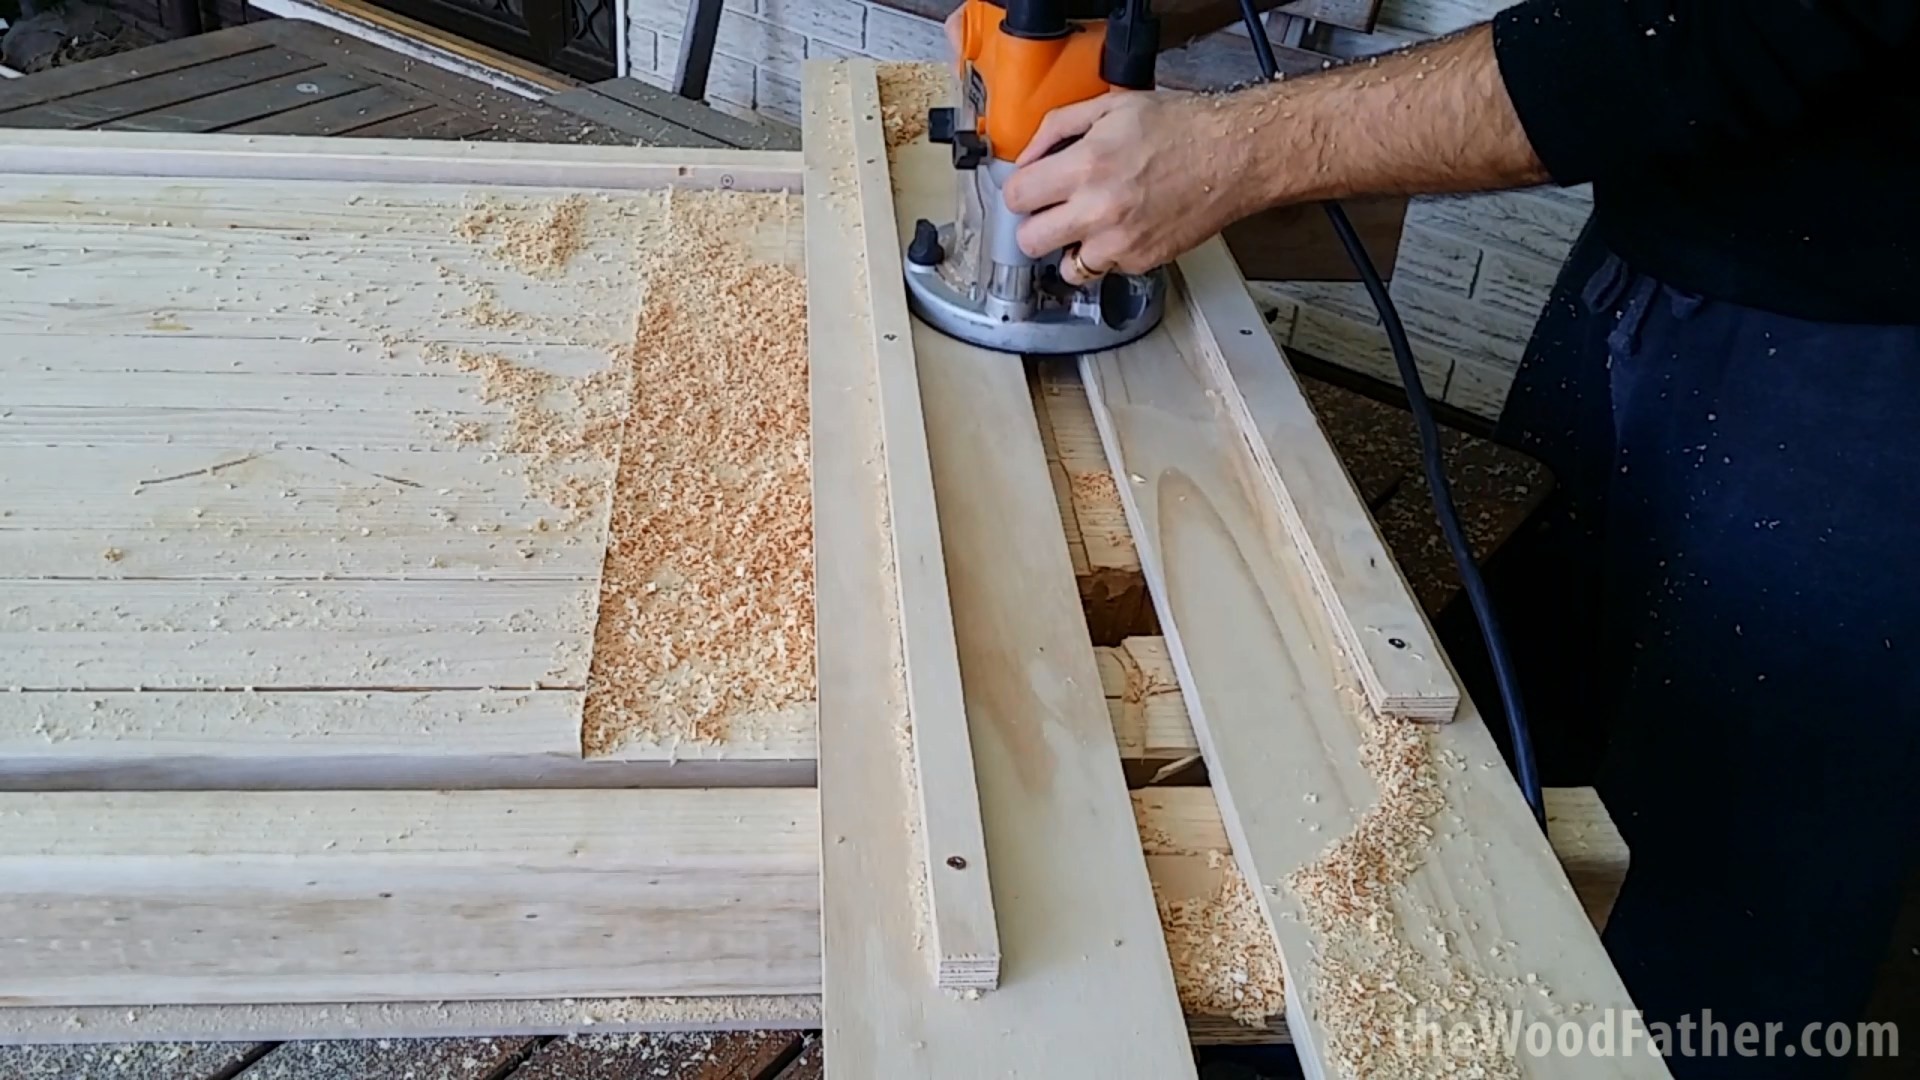
Flattening the Slab
On what I did:
 |
 |
 |
 |
 |
This was the job I was simultaneously excited about and also dreading! I knew I would use the router method to flatten it, but I was stymied once again by the lack of long enough clamps to emulate how I’ve seen it done elsewhere. The Wood Whisperer has an excellent video demoing this technique.
Breaking down the job, I figured that it was just a sled running across a couple of parallel surfaces. Looking around, I came to realise that my outdoor picnic table was large and flat. I placed the slab directly on the table on an angle so it would have as much support as possible, and then placed two long and straight lengths of pine along each side. I packed those lengths up a little with mdf offcuts, that meant that these outside runners were around 10mm taller than the slab.
I then built a very simple sled for the router out of some scrap plywood. It is just a flat bridge which can traverse the span between the two runners without losing its shape due to the weight of the router. It has a channel down the centre so that the bit can pass through and trim the very top off of my slab.
The slab itself was fairly flat when I began, it had a slight tilt in it from one particular length which seemed to be wider than the rest, closer to 94mm high rather than 90mm. While I did have to rout the entire top, for the most part it was removing 2mm or so of material. For the high section though it did have to cut through over 6mm at times.
After the first pass, well, I wasn’t really impressed. There were very obvious lines, grooves and channels in the slab, it was very ugly. Ridges and cliffs were everywhere, and at this point it’s safe to say that I thought I had ruined the whole bench.
But, after looking at the bench closely I realised what I had done wrong, I’d used far too much downward force when cutting through the centre of the slab. Because it was on an angle, when I got near the centre I instinctively leaned forward to reach easier. This meant I pressed down harder, and cut more material out which left the ugly channels.
To fix this, all I had to do was not press so hard!
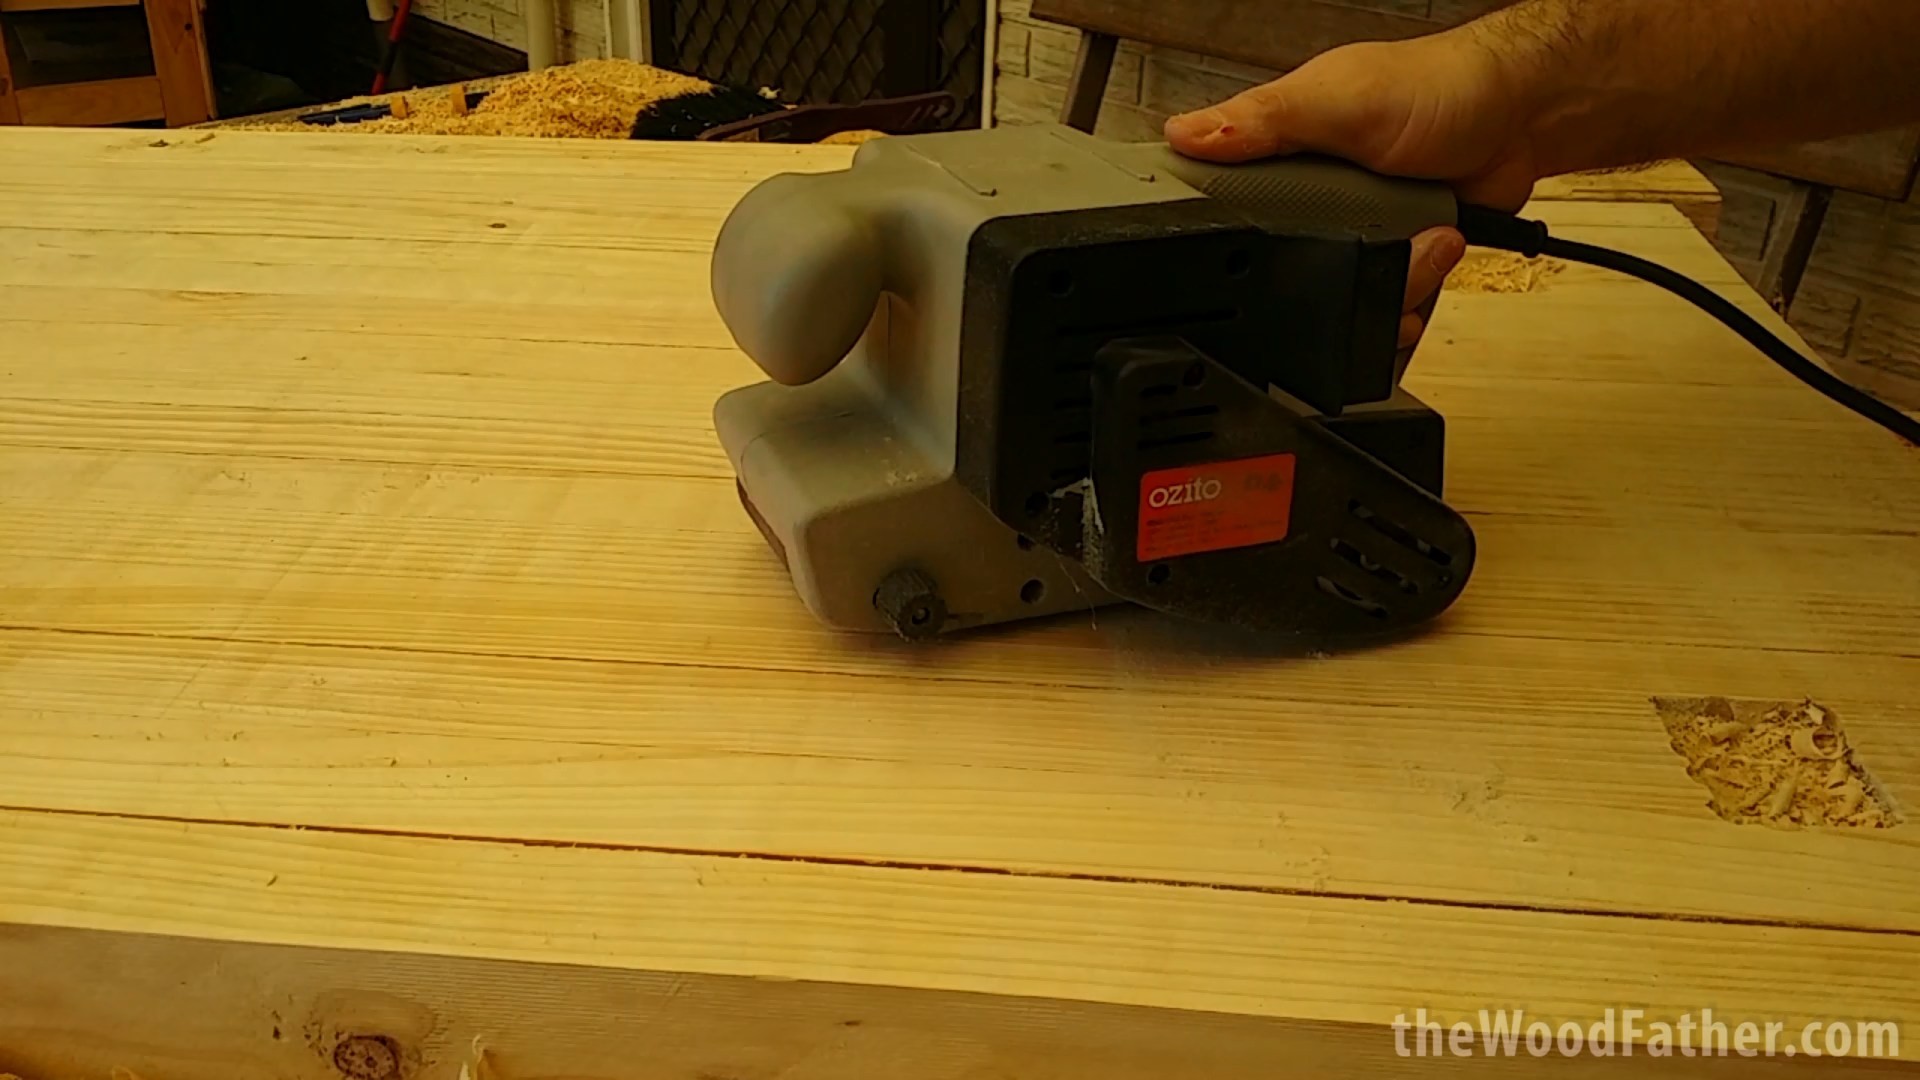
I set the router to cut the entire bench to the depth of the worst channel, and went over the whole thing again. This time I was careful to only ever slide the router back and forth, I never pressed down when moving it. This had a huge impact on the slab and cleaned it right up.
To finish it off, I grabbed my little hand plane and belt sander, and worked my way over the top, making it as smooth as i thought it should be. It ended up looking fantastic to my eye, so I’m pretty pleased with how it turned out.
If I was to do it over:
I would absolutely use the same method again, it worked a treat. I would probably even go so far as to lie the slab down on the floor instead of another table. That would make it easier to reach across it.
I would build a better sled though. My one worked, but I really dropped the ball here and didn’t make it strong enough. Even being careful to slide the router back n forth, the sled had a little bit of give in it and flexed downward ever so slightly. All I needed to do was brace it a bit more, but for some reason I chose not to.
I think it was a safety net for myself, I figured if the slab didn’t come out flat that I could blame the sled instead of blaming the operator. Luckily it didn’t come to that, but I would certainly beef up the sled if I was to do it over.
I used a 1/2in flat bit in the router. I think I would have had a much easier time had I bought a specialty bit for this purpose, but I couldn’t bring myself to spend the money on a bit I would use once. I would use the same 1/2in bit again next time too.
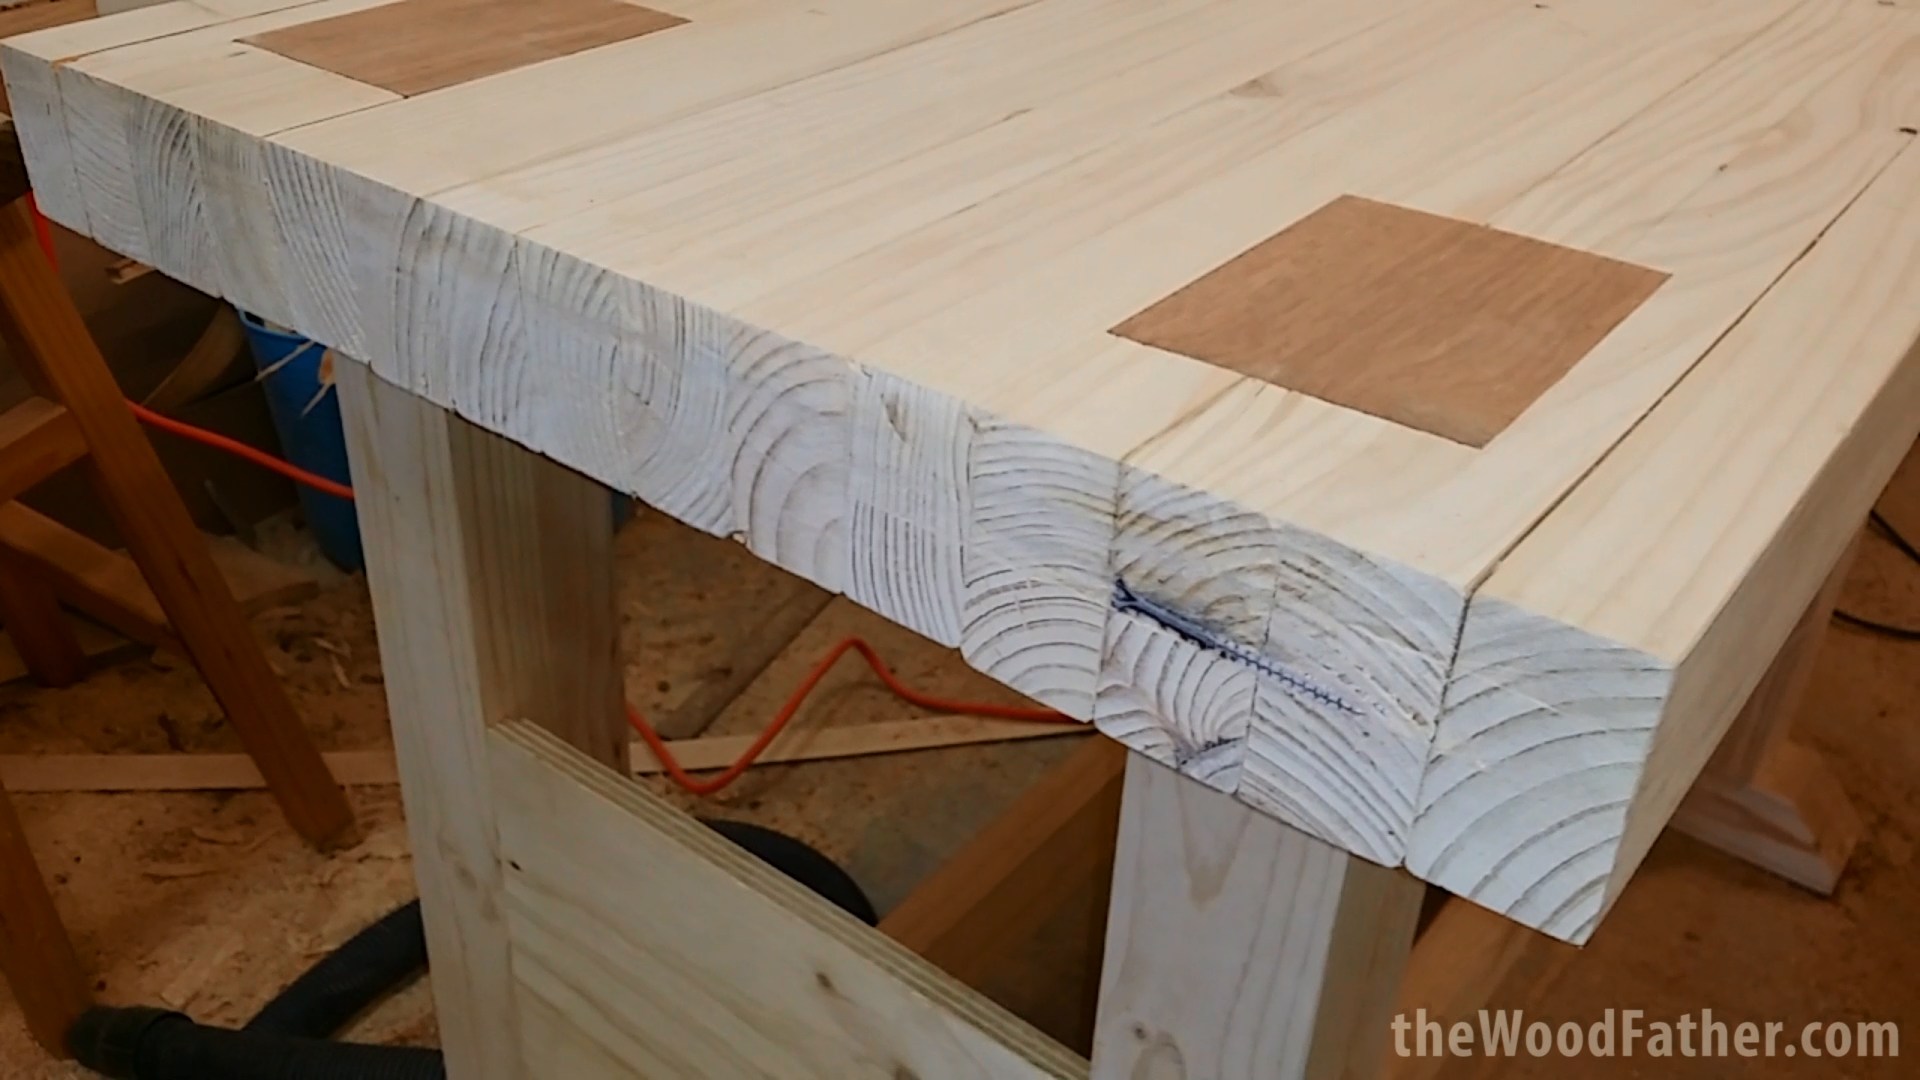
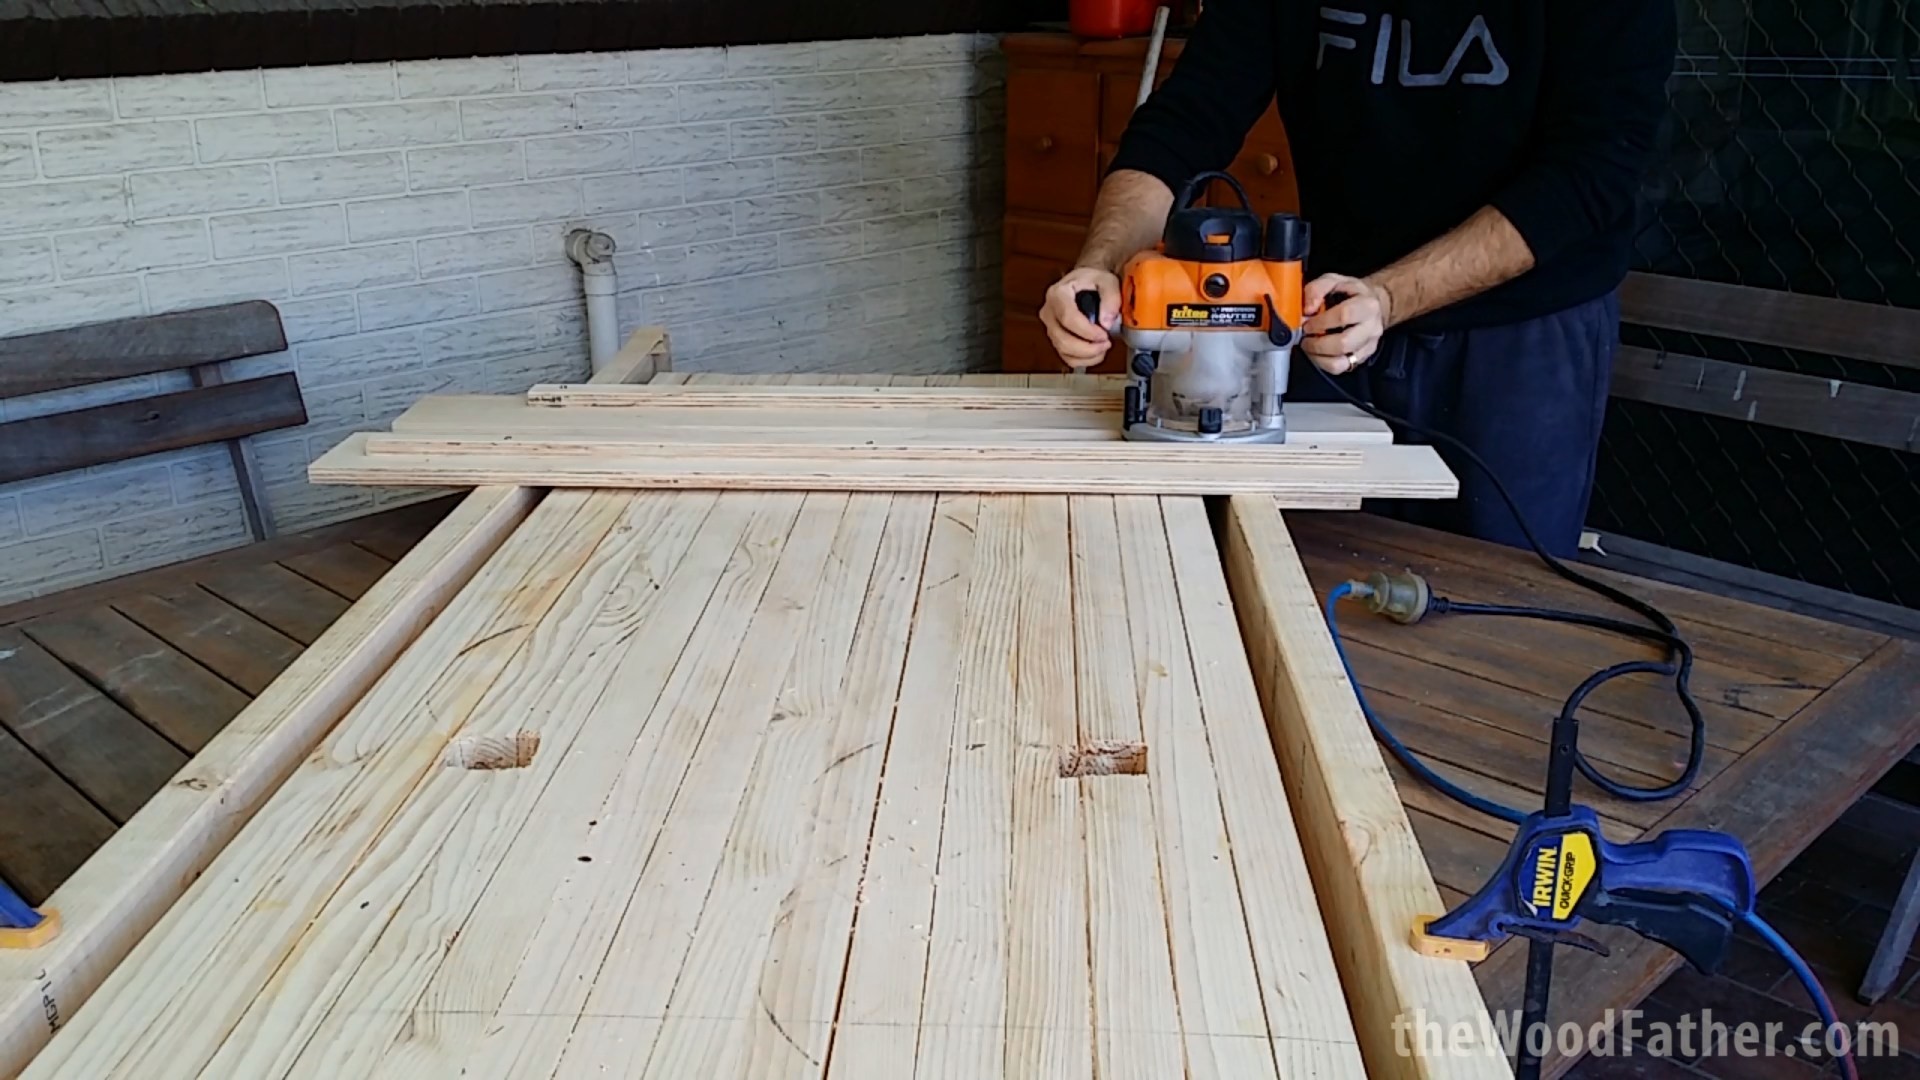
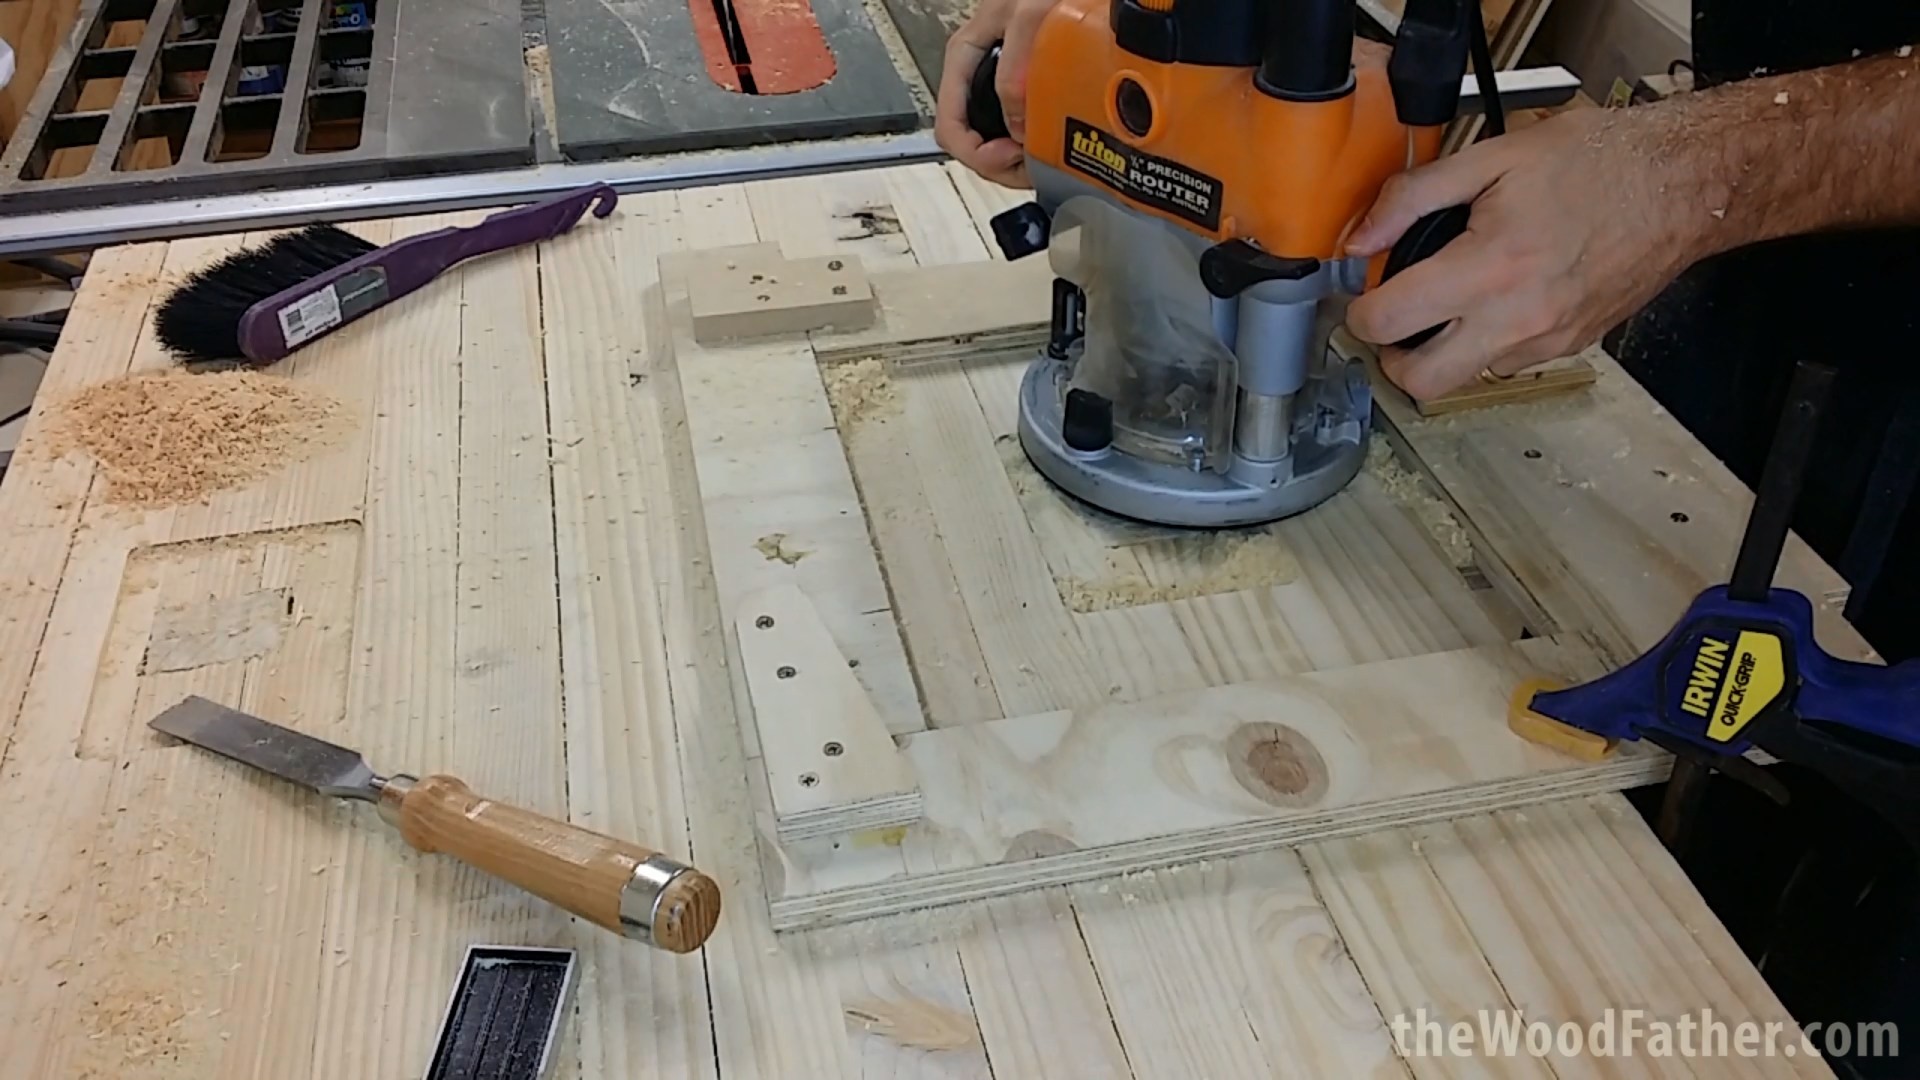
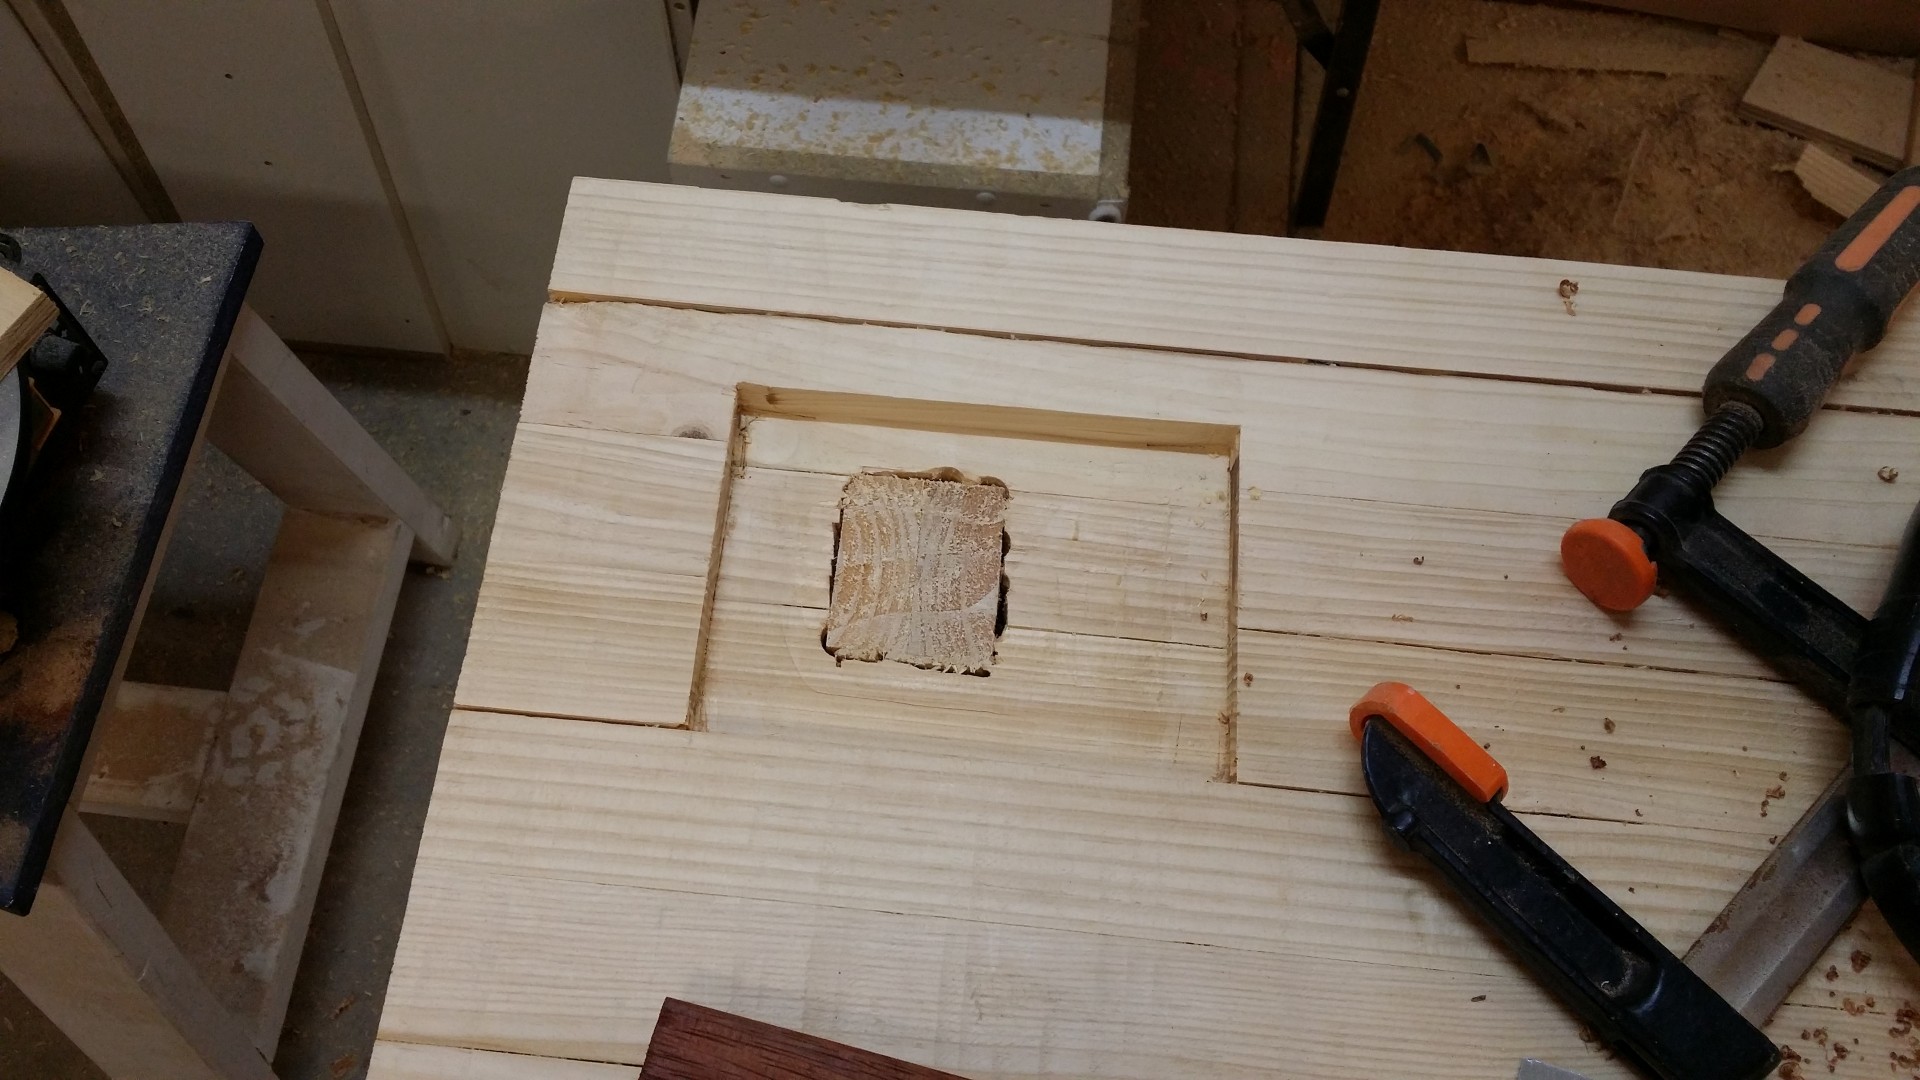
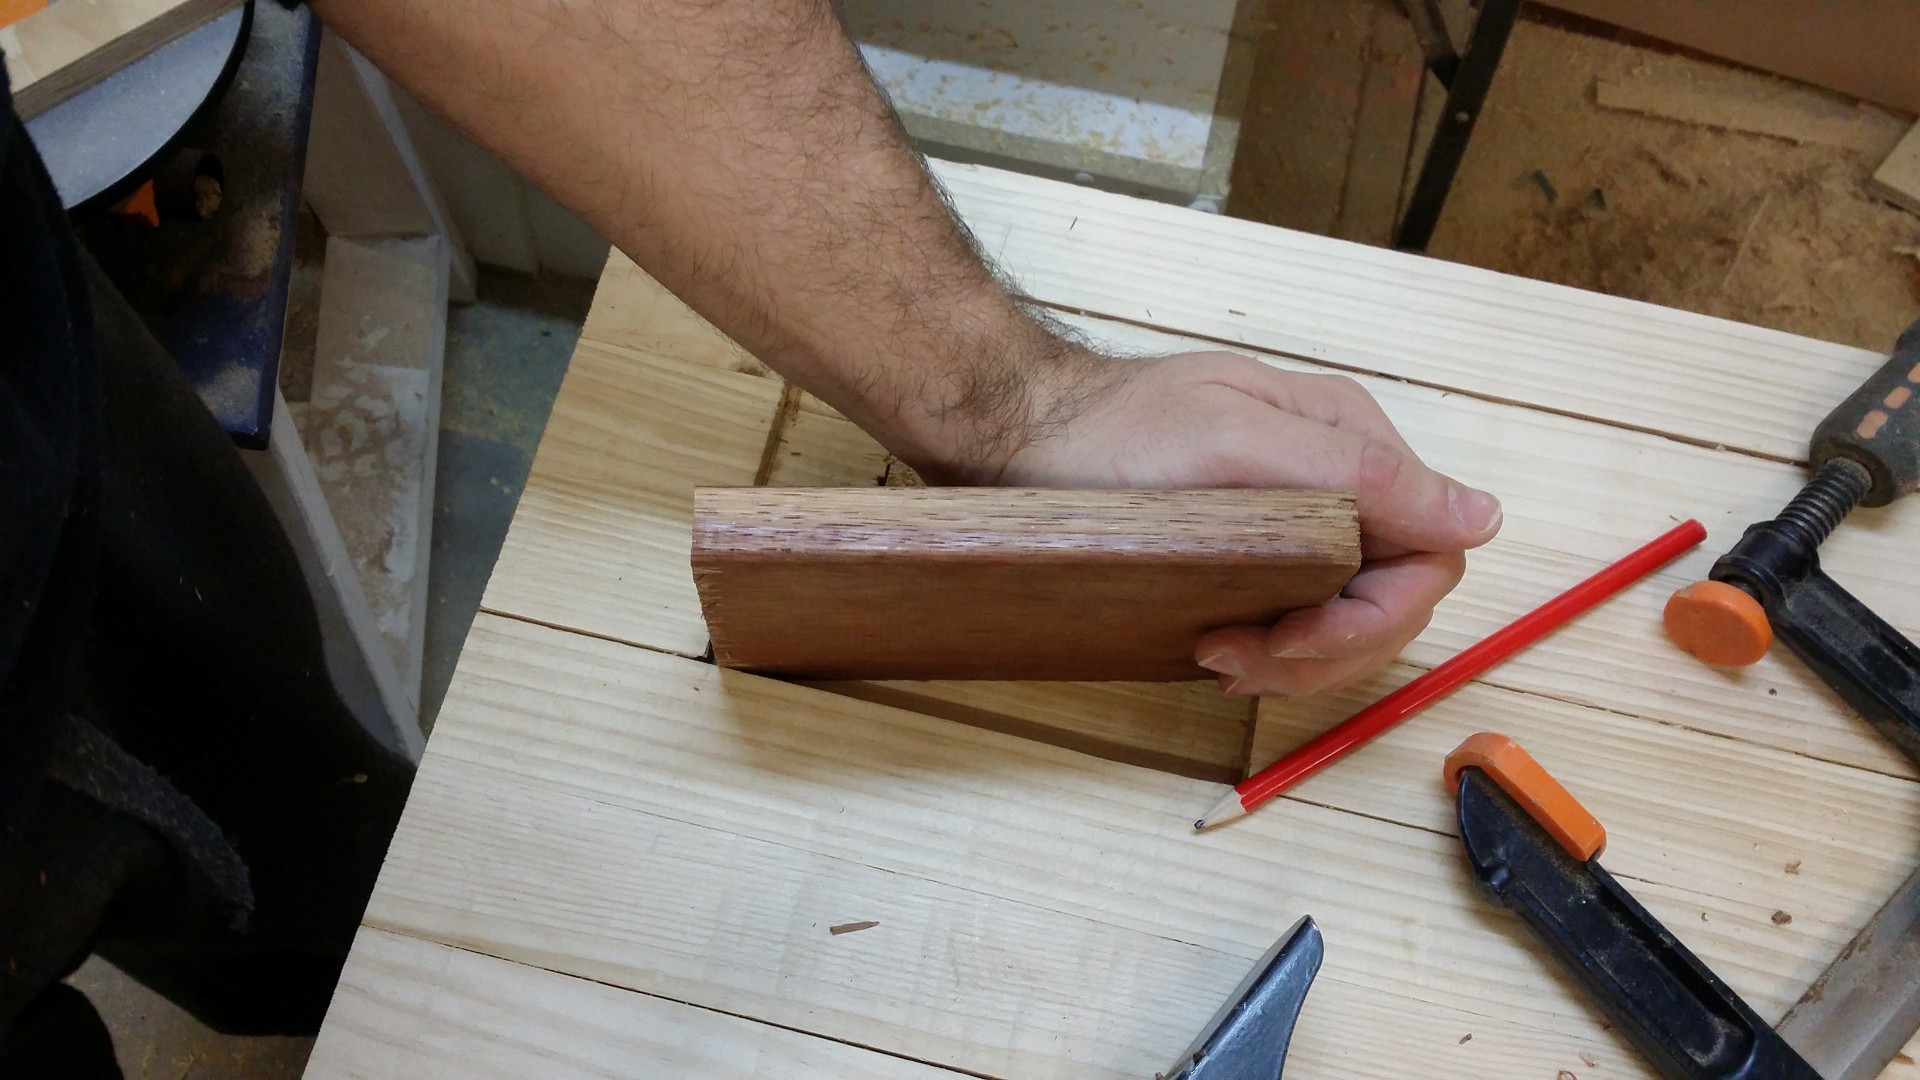
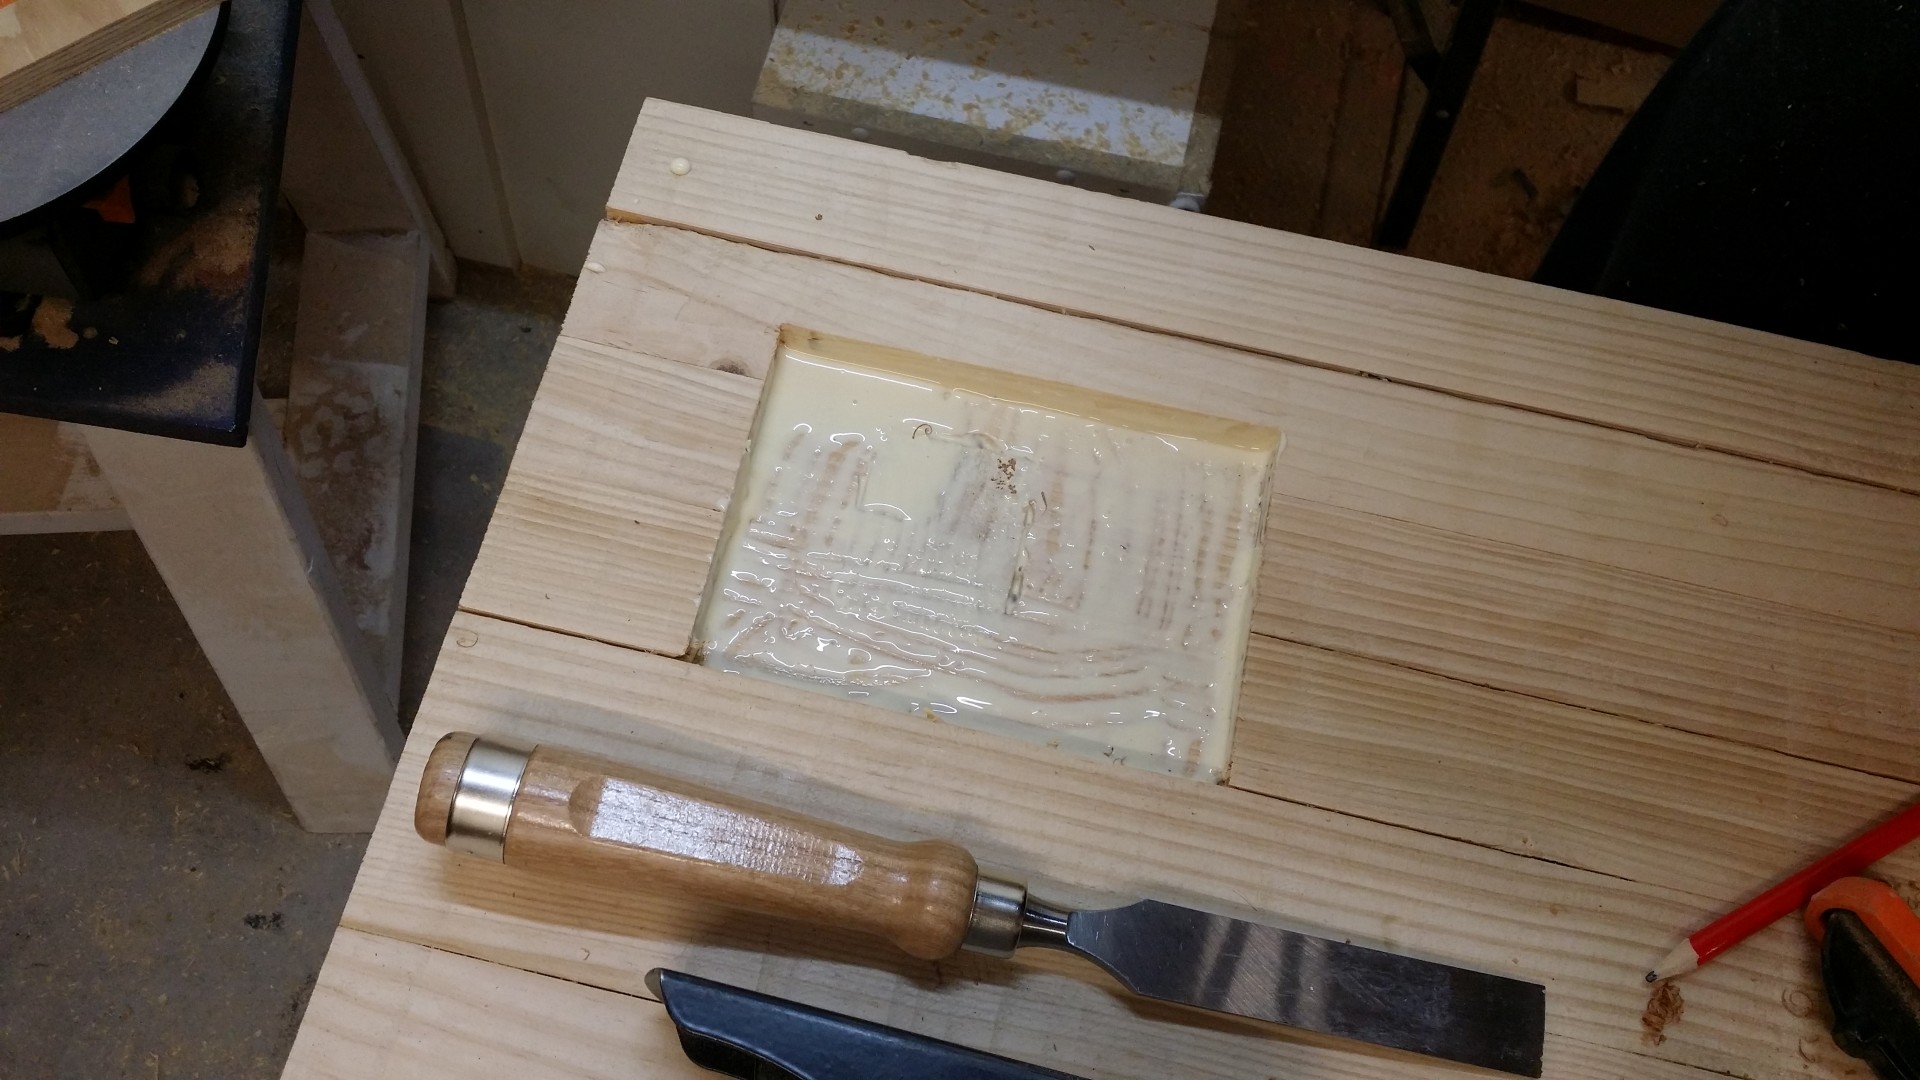
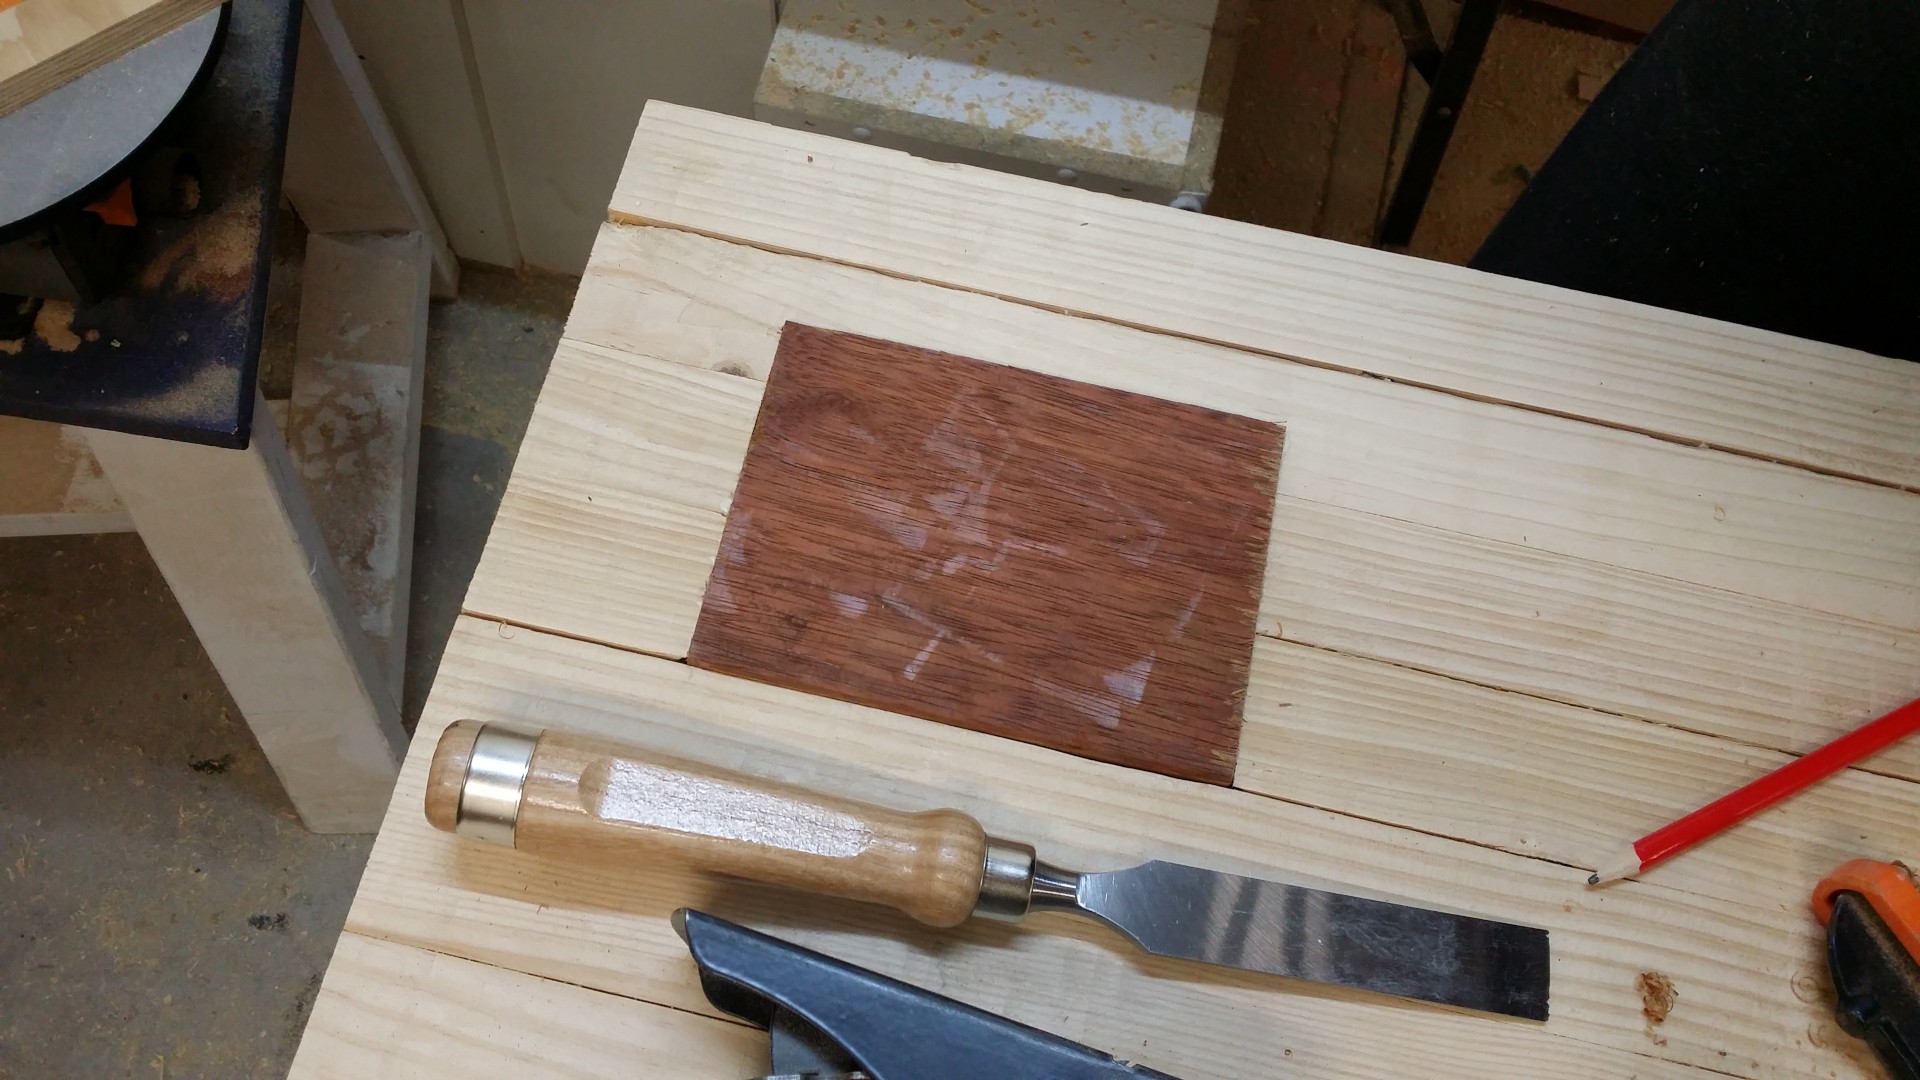
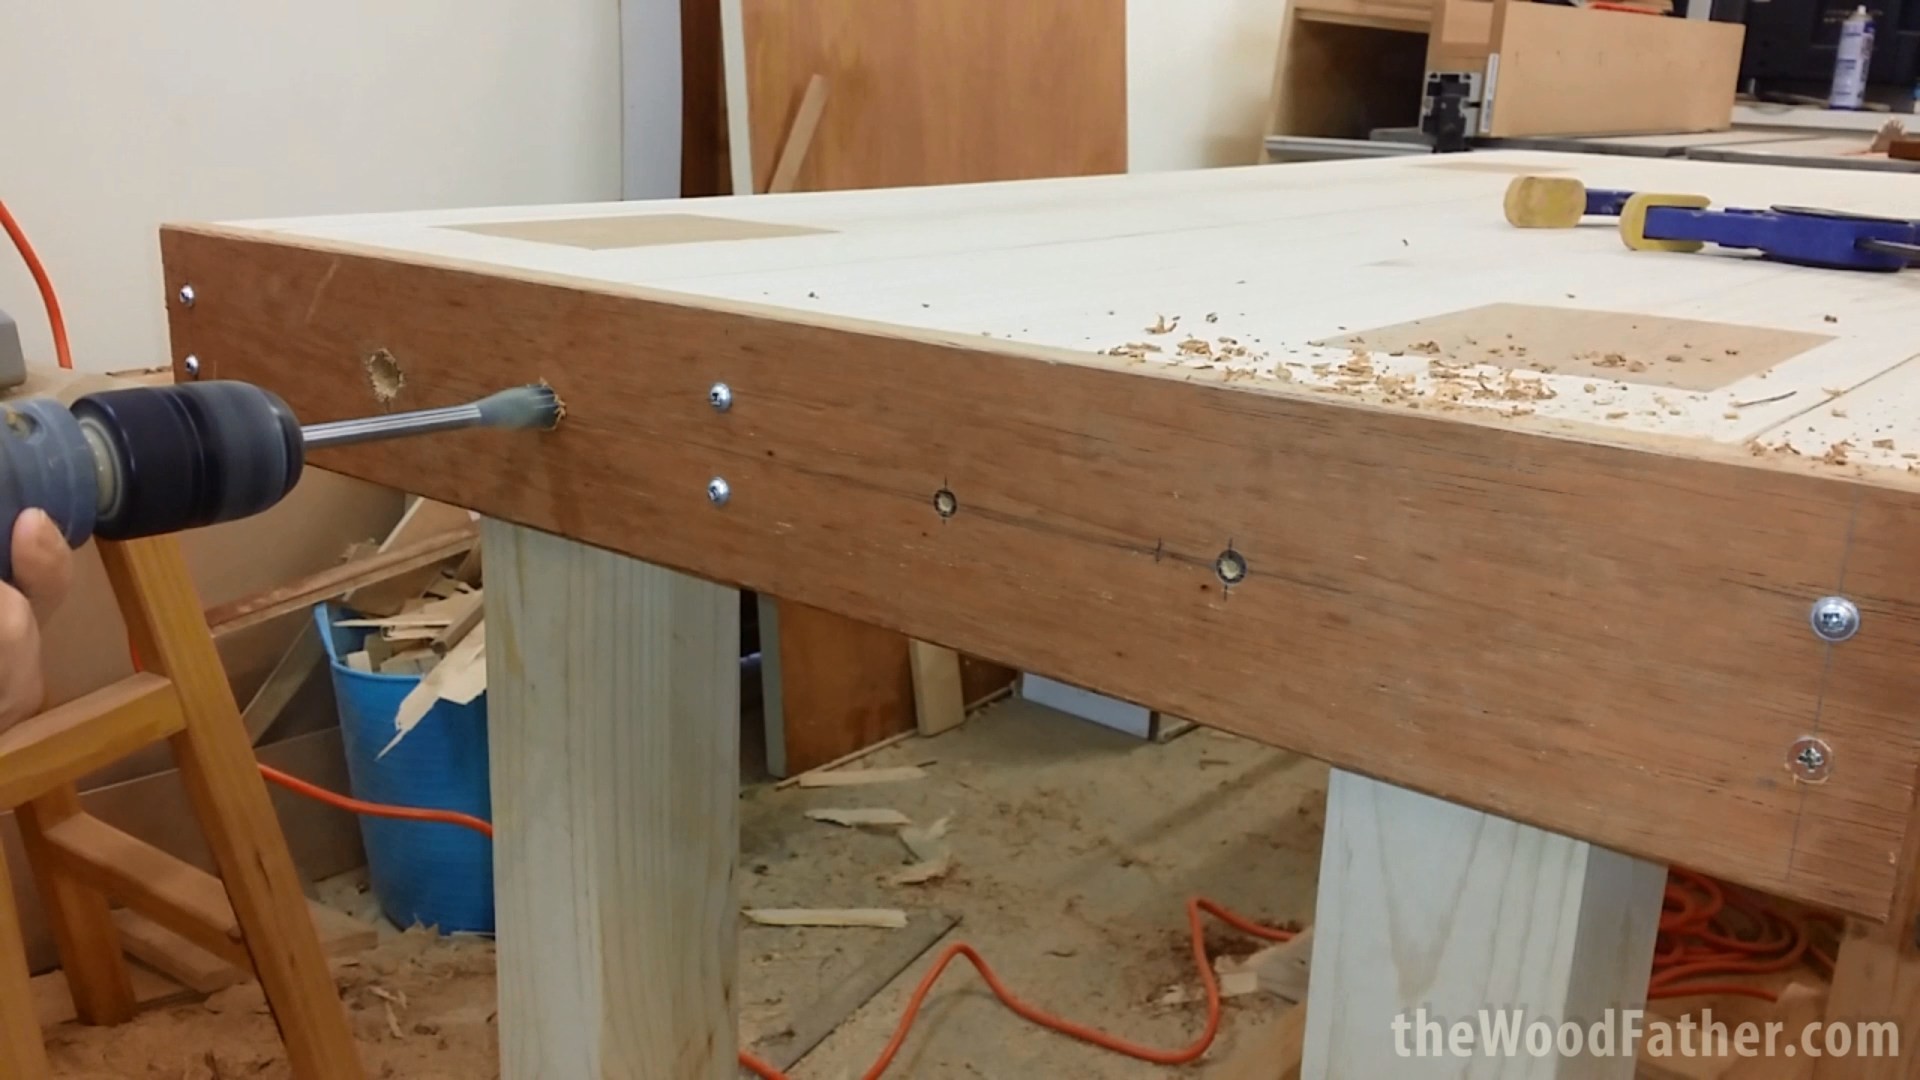
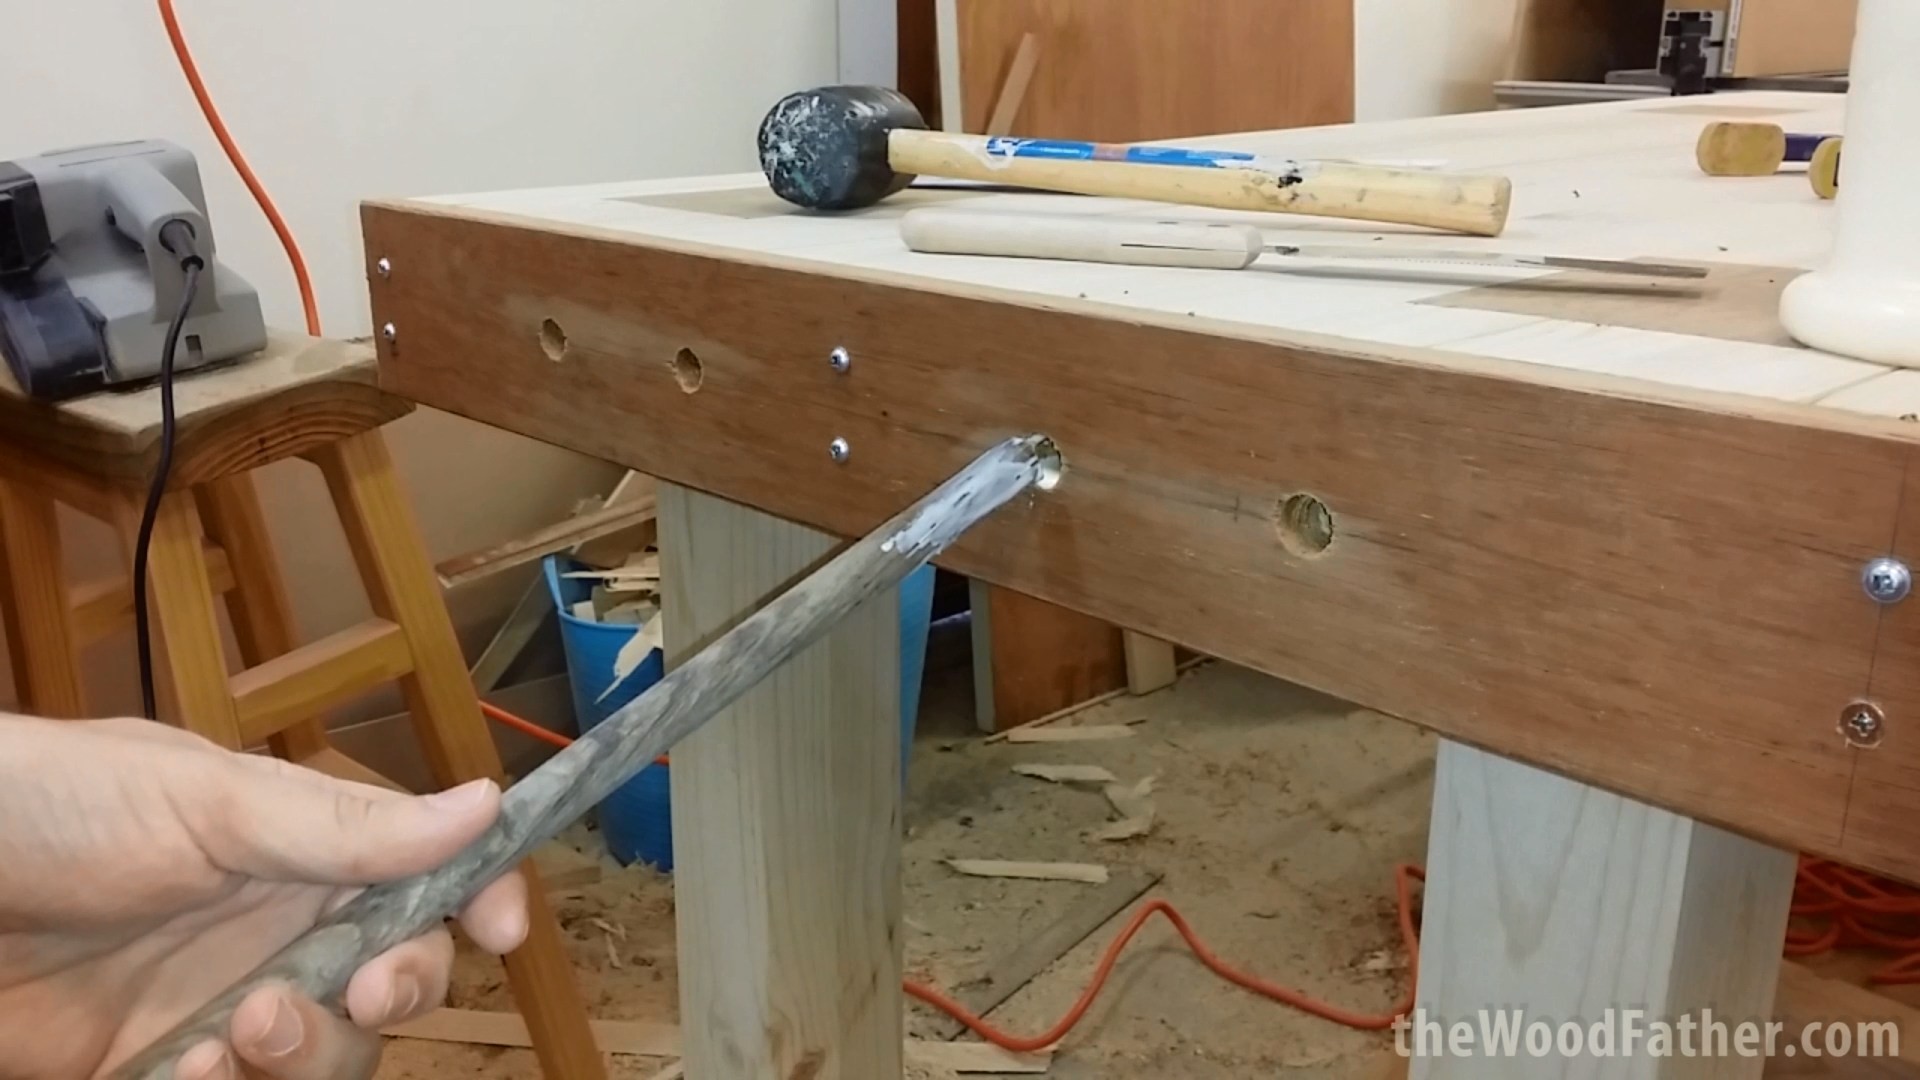
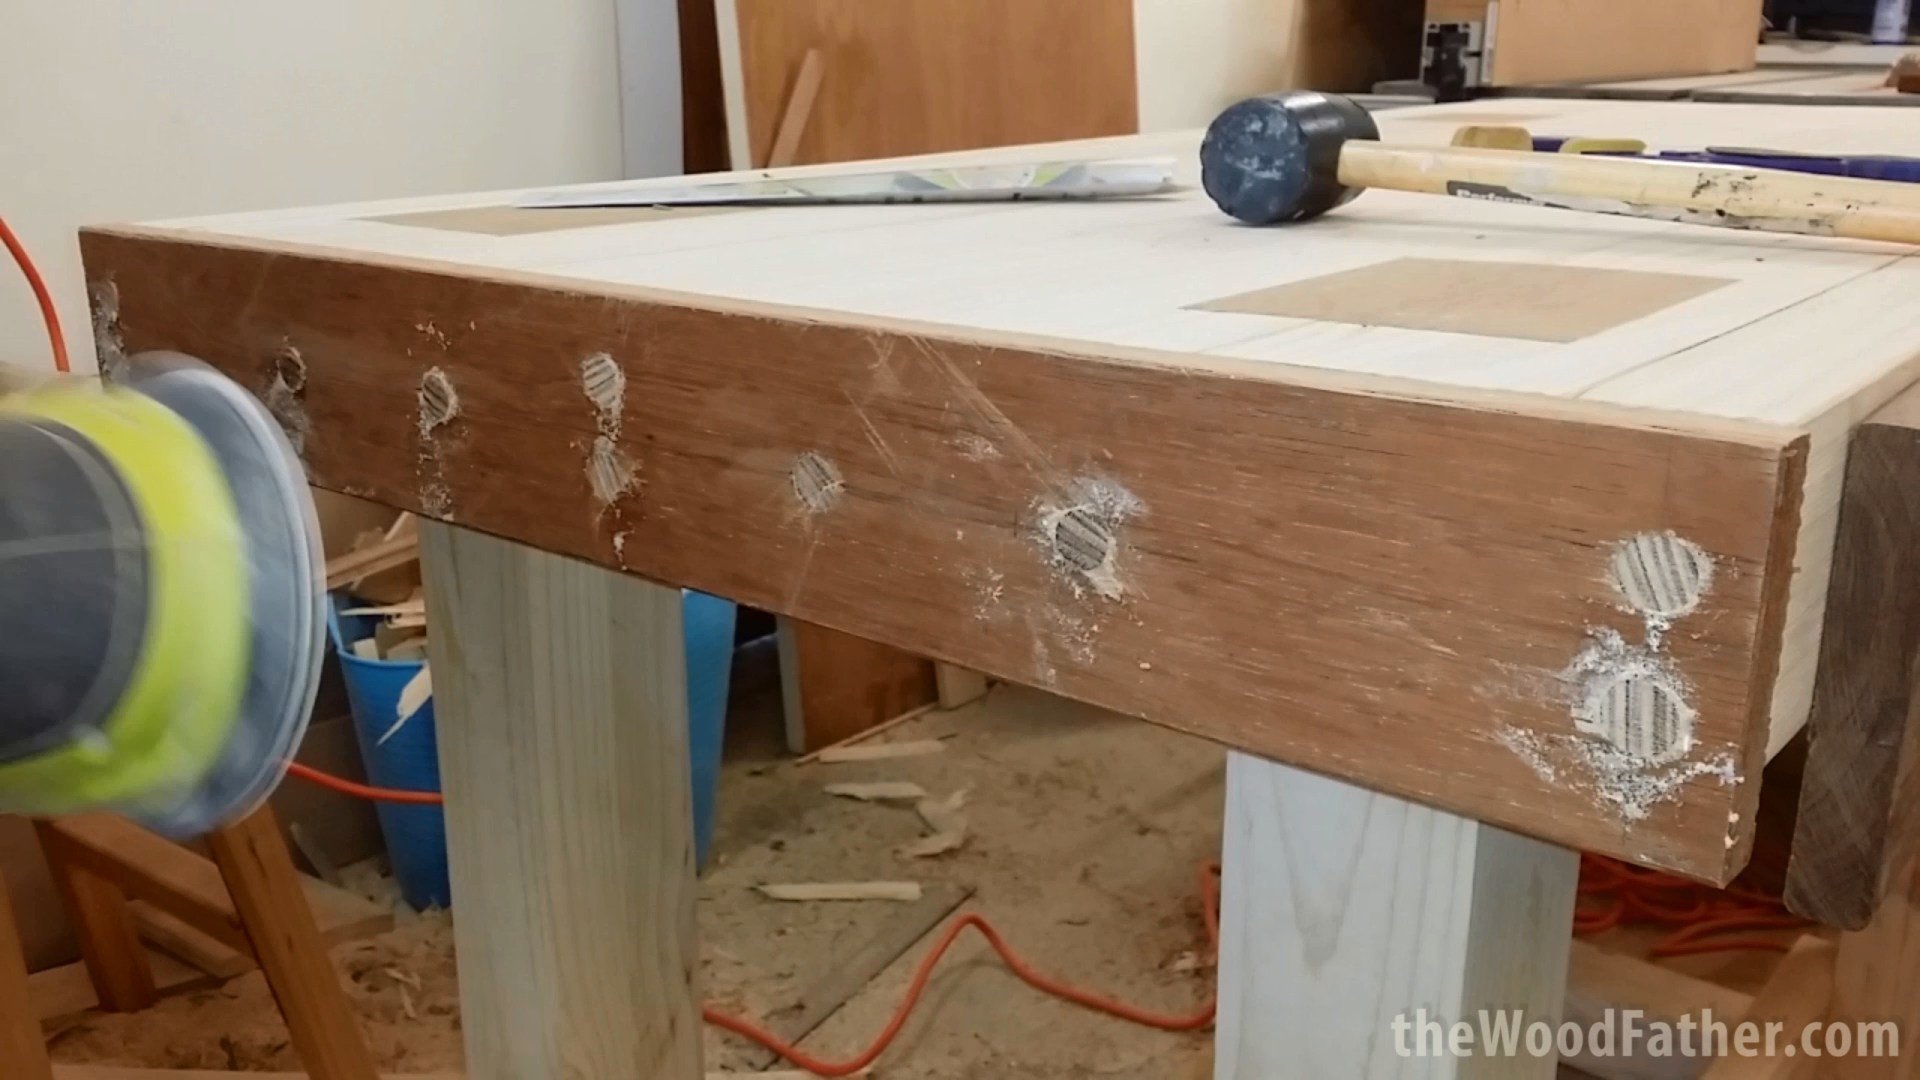
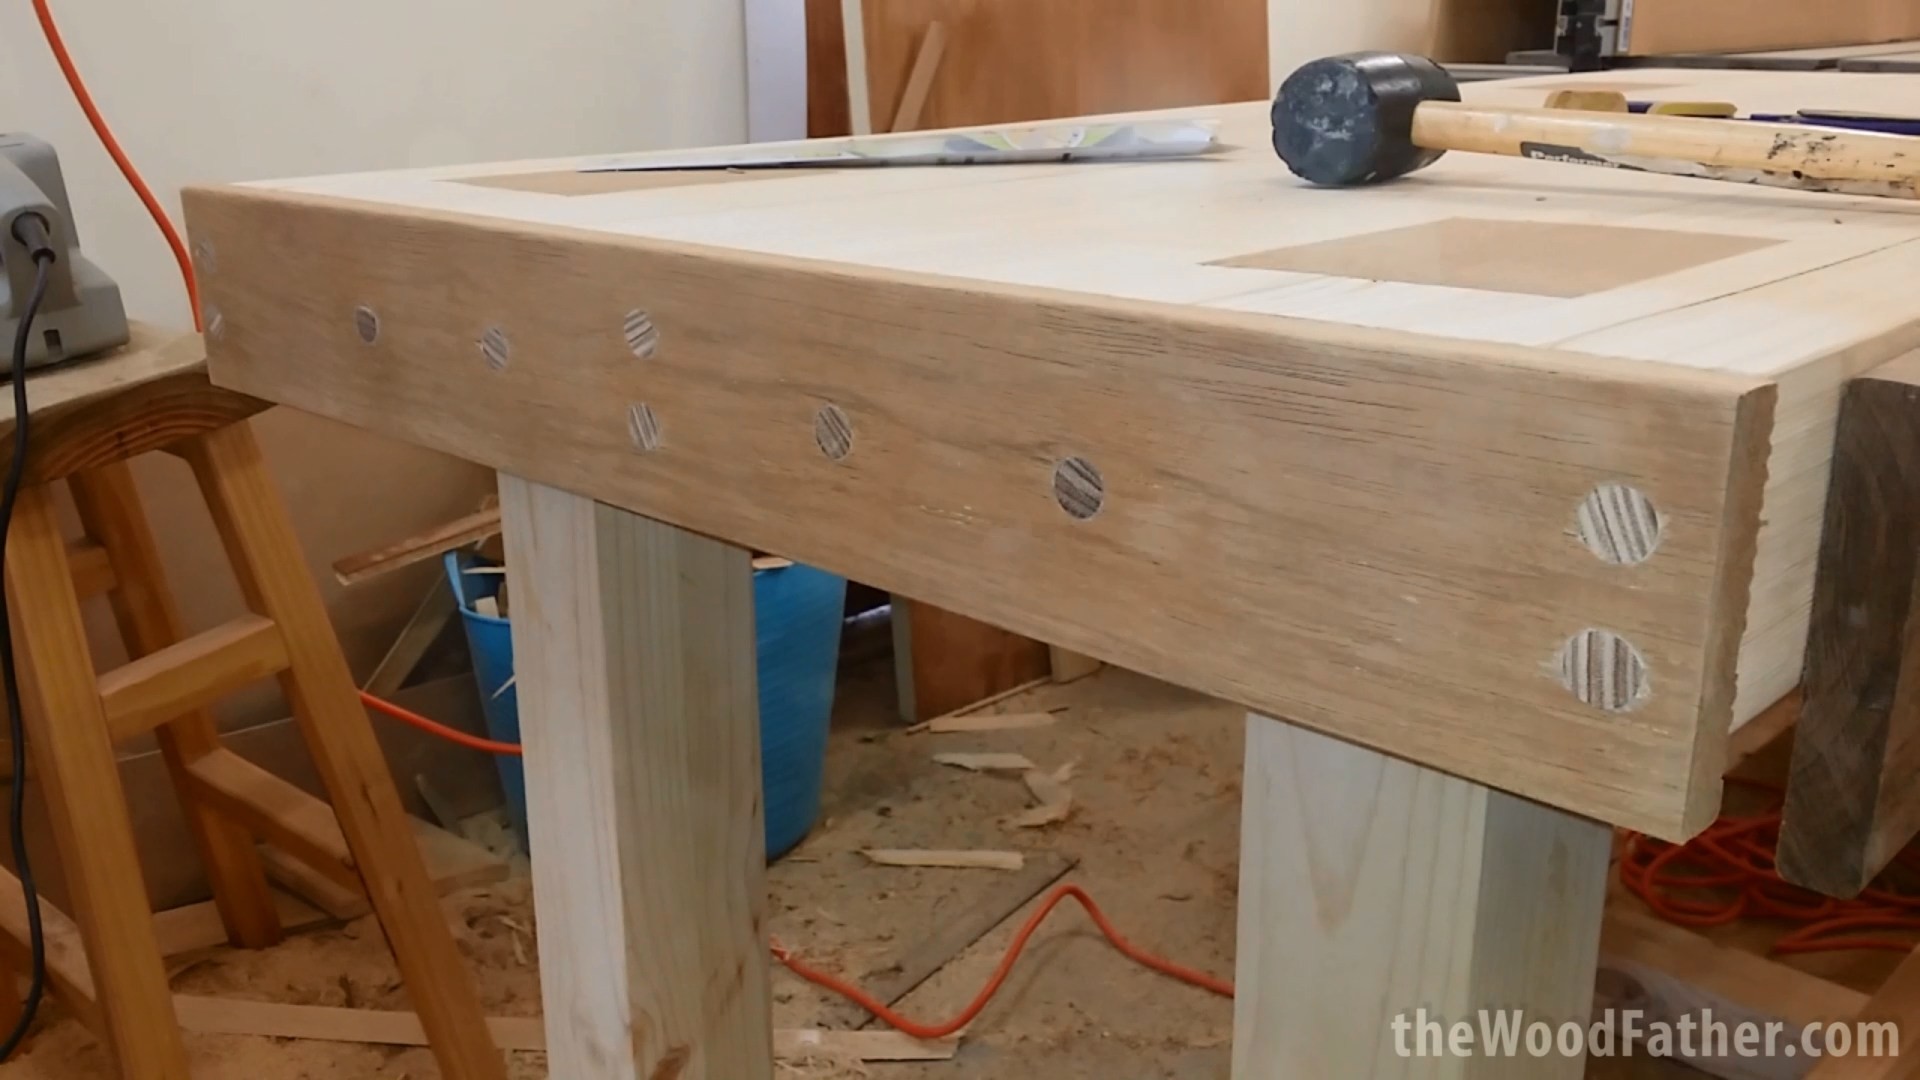
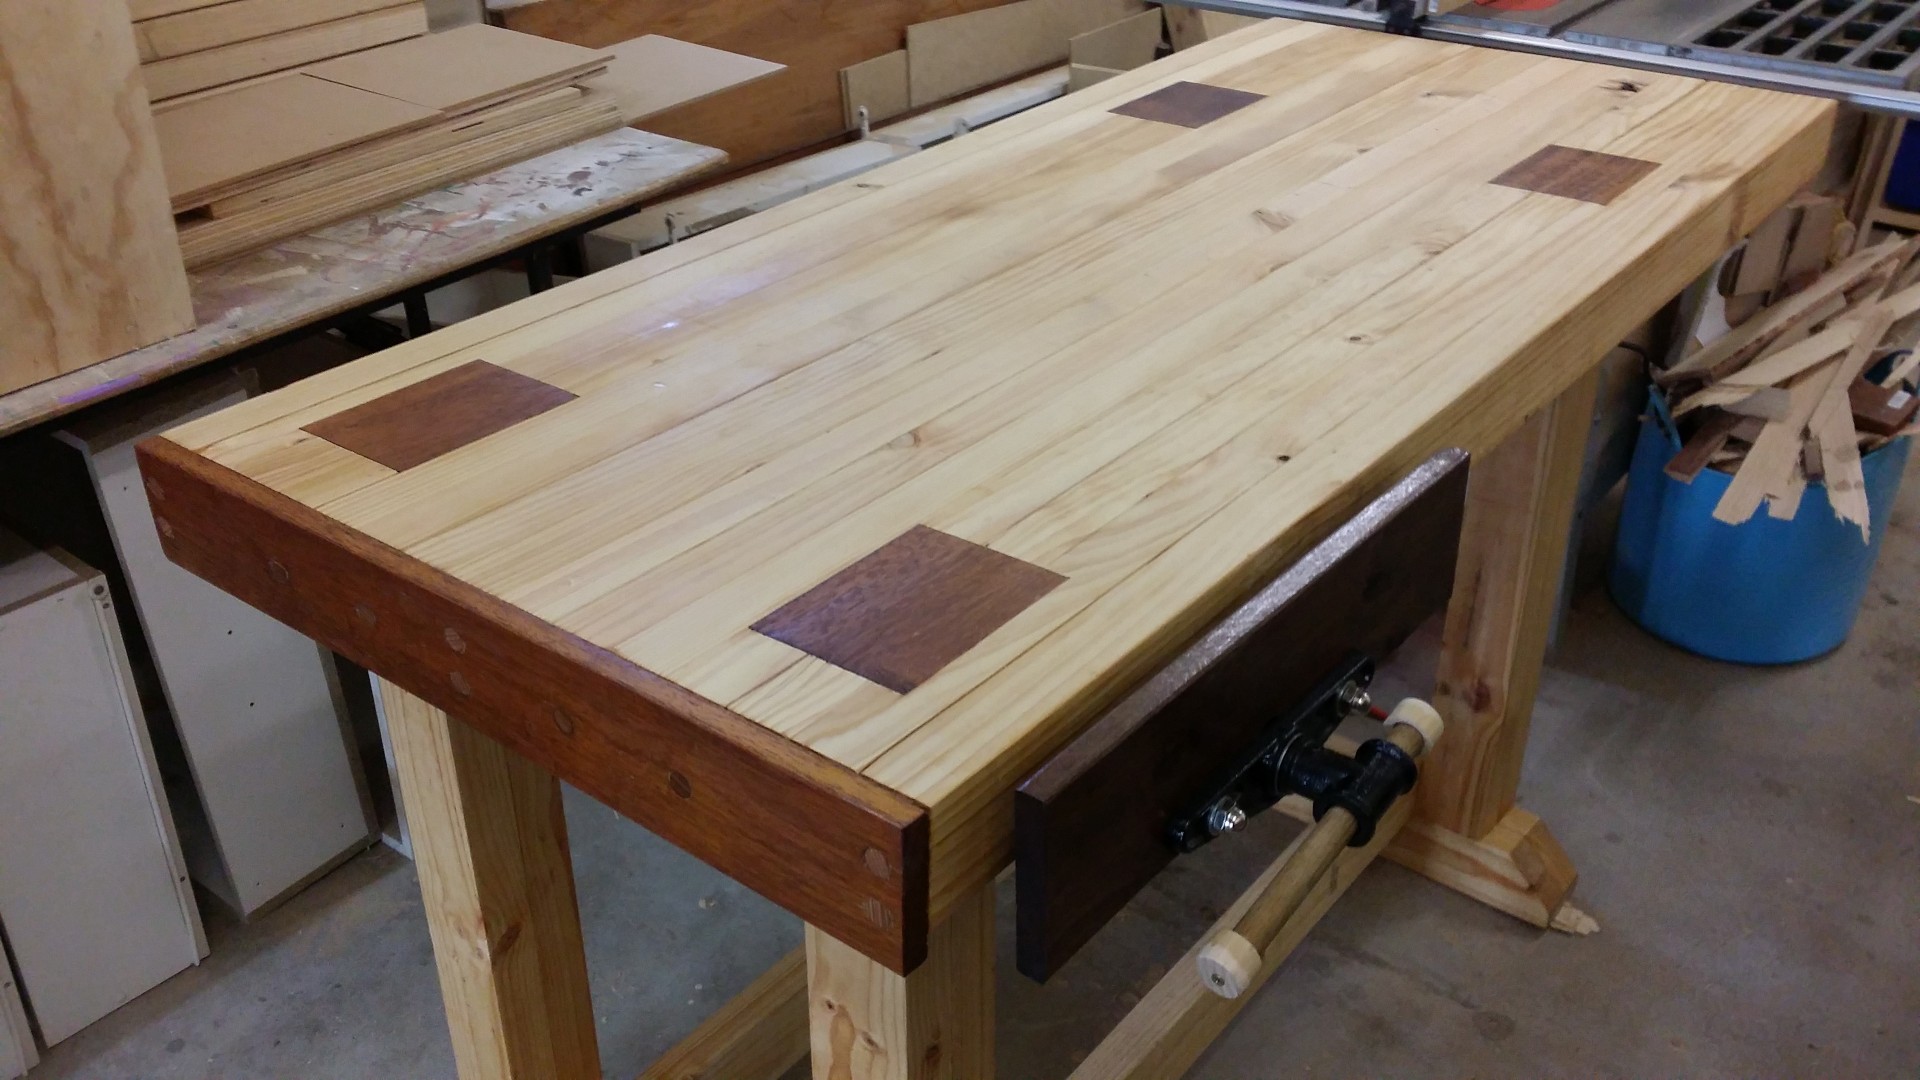
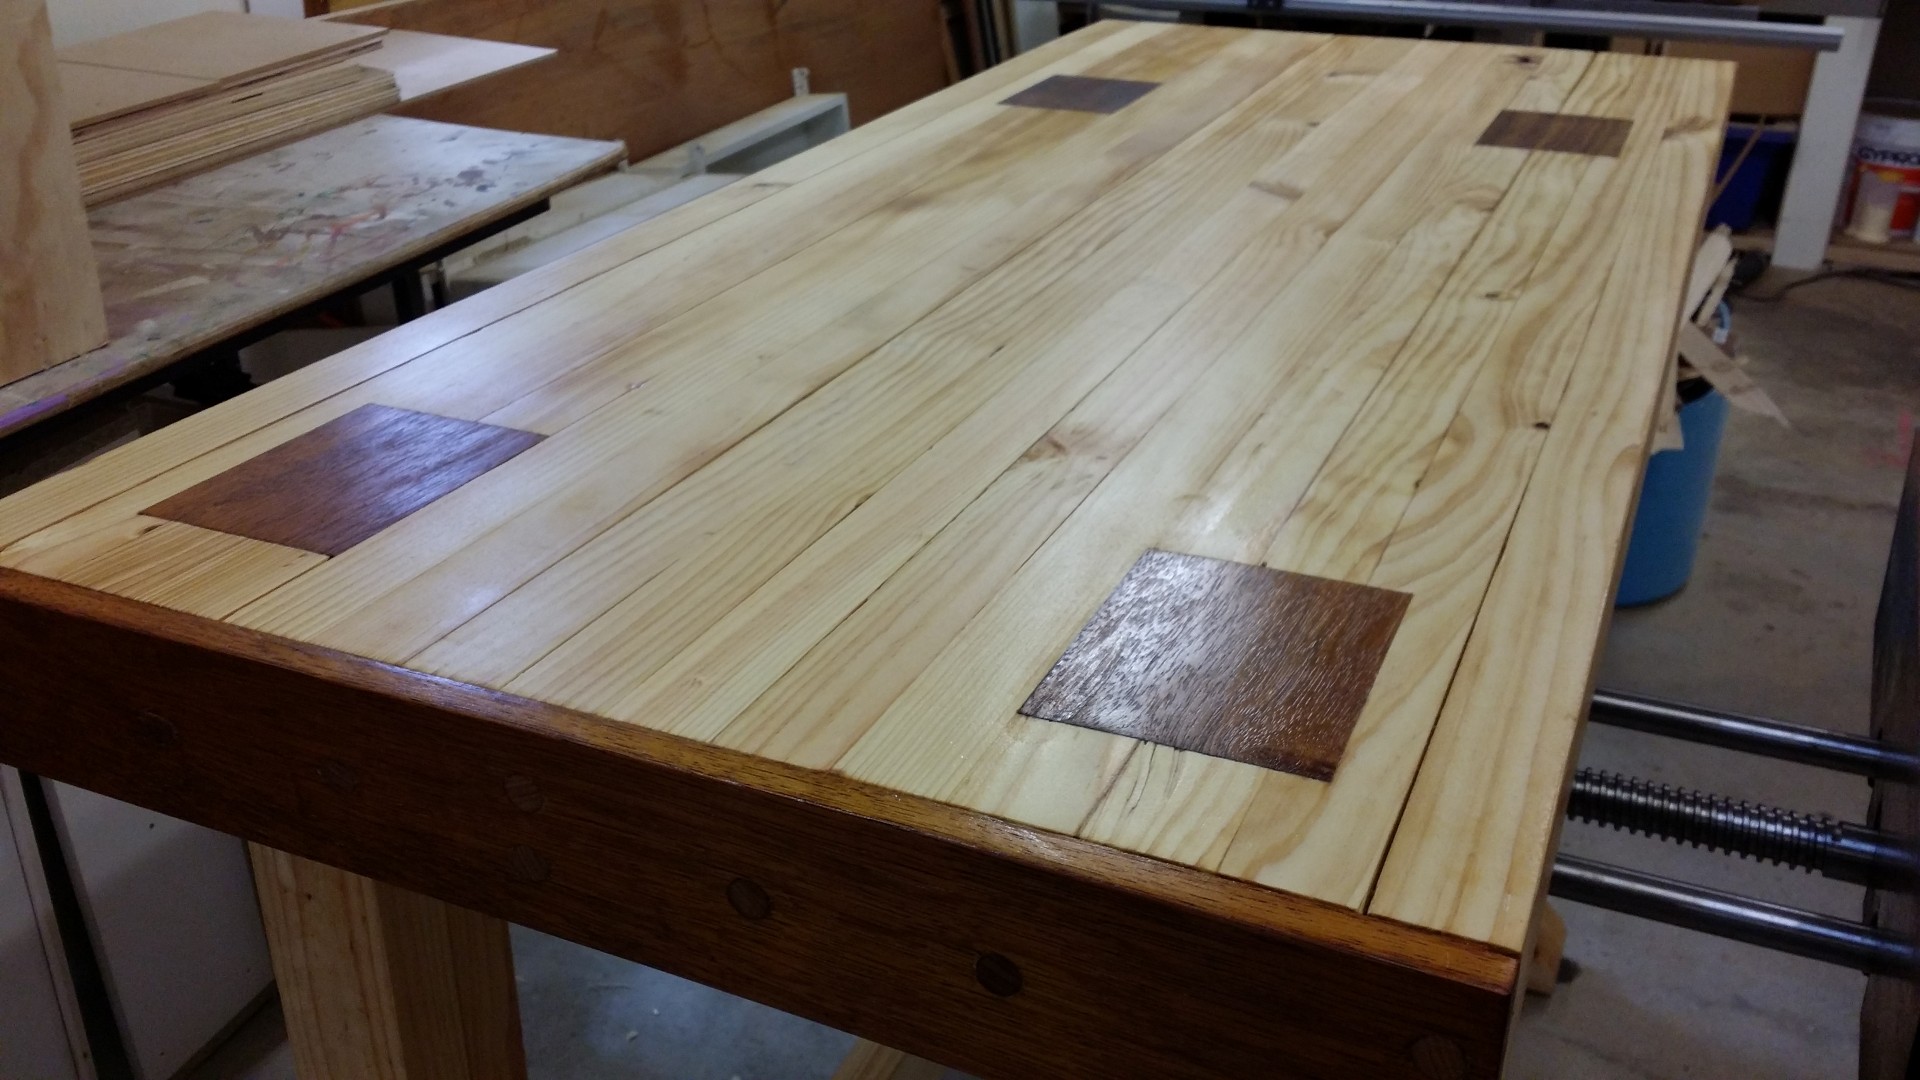
Inlays in the slab
On what I did:
 |
 |
 |
 |
 |
 |
Well, you gotta hide your mistakes somehow don’t you?
I figured that hardwood inlays in the pine would look great, and that they would also hide the ugly job I did with the joints. While structurally the table is very sound, it is super solid, those joints don’t look too flash at all. So instead of leaving them to be seen, I grabbed the router and some more scrap wood.
This time I made a rectangle shape, which let the router cut a roughly 160mm by 10mm inlay over the centre of each joint. I cut down to around 10mm, I didn’t want to actually weaken the joint, and then trimmed the corners sharp with a chisel. It was a simple matter to cut and glue some hardwood into those areas after that.
If I was to do it over:
I would absolutely do this again. I think these inlays make my workbench. I love the look of them, not too much embellishment, not too little, they are to my eyes, perfect.
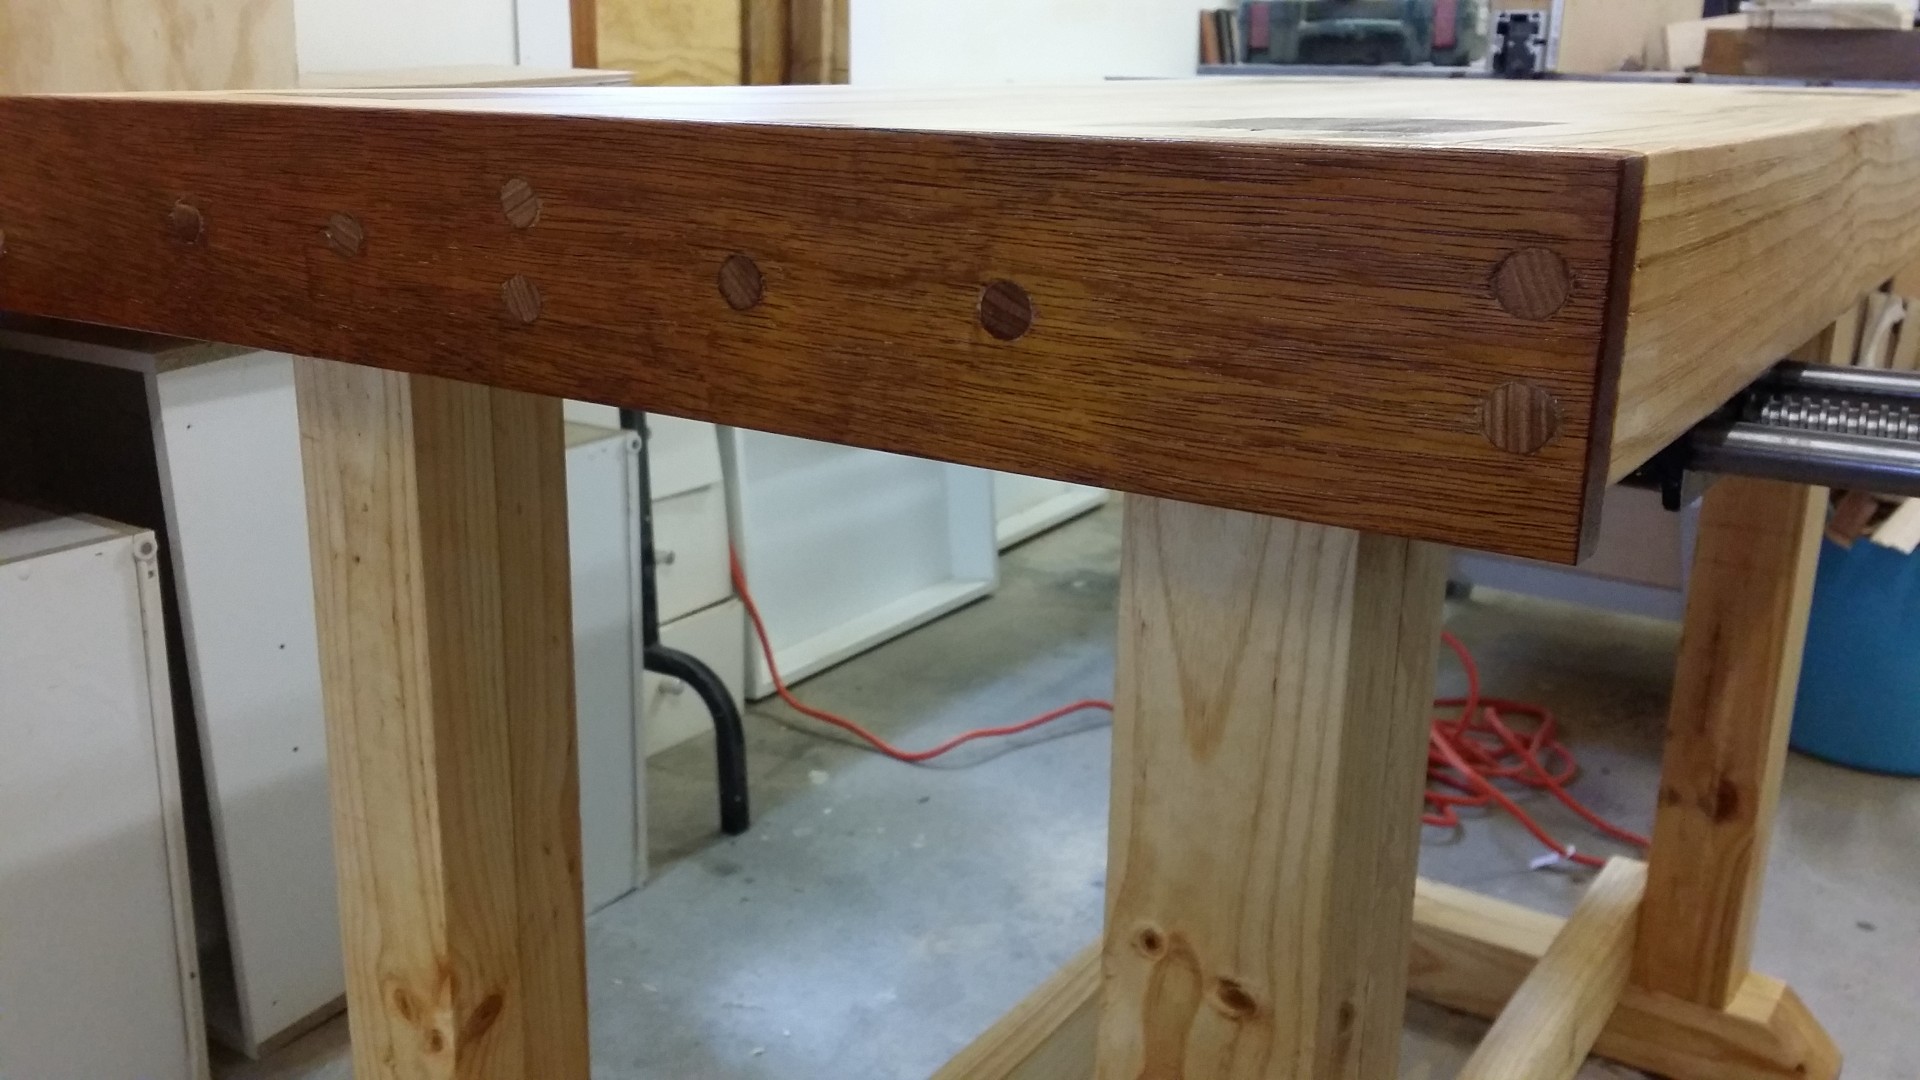
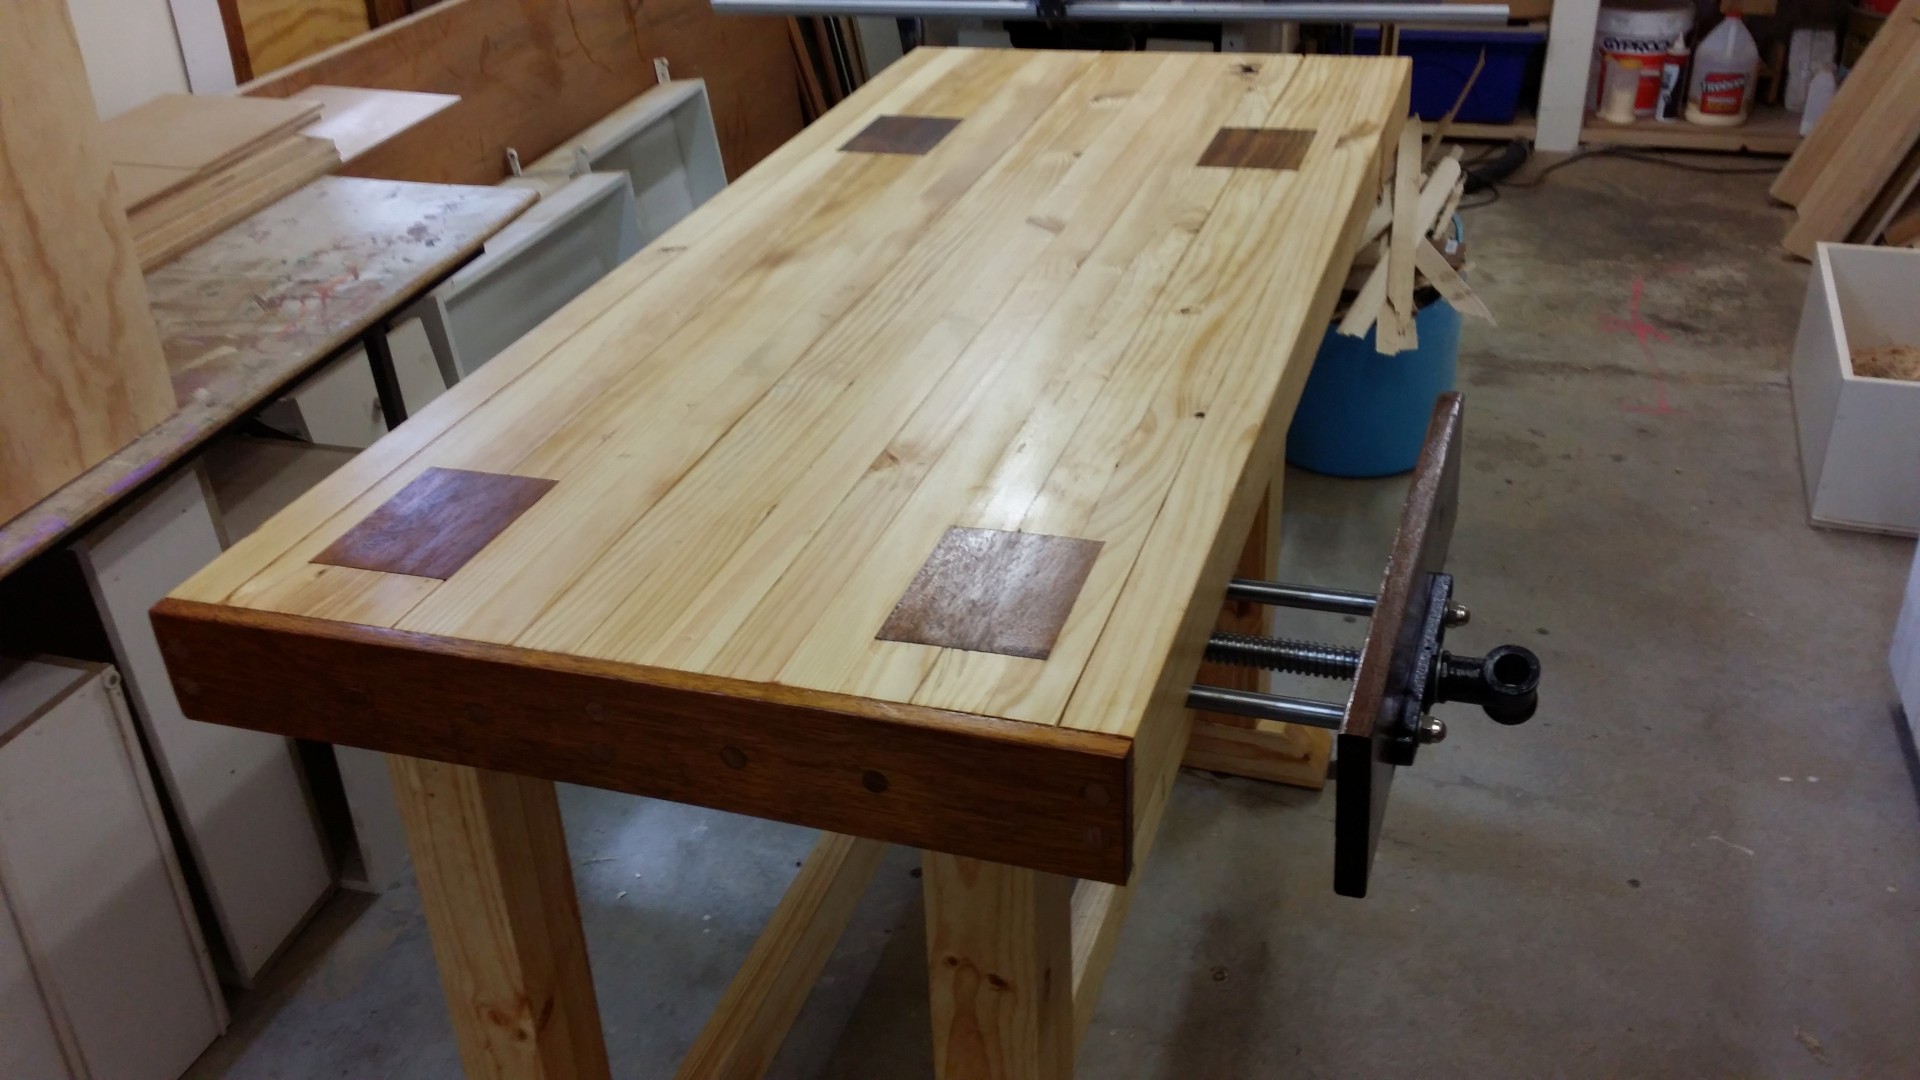
Installing an end cap
On what I did:
 |
 |
 |
 |
This process was straightforward.
Cut a length of hardwood to size, glue and screw it into the end grain. Once the glue was dry, I removed a couple of screws, drilled out the holes and inserted some hardwood dowel in place. When that dowel dried, I repeated the process until all the screws had been replaced. Finally a nice sanding to make sure everything was nice and smooth.
If I was to do it over:
I would make sure the end grain on the dowel aligns! ugh, so obvious now!
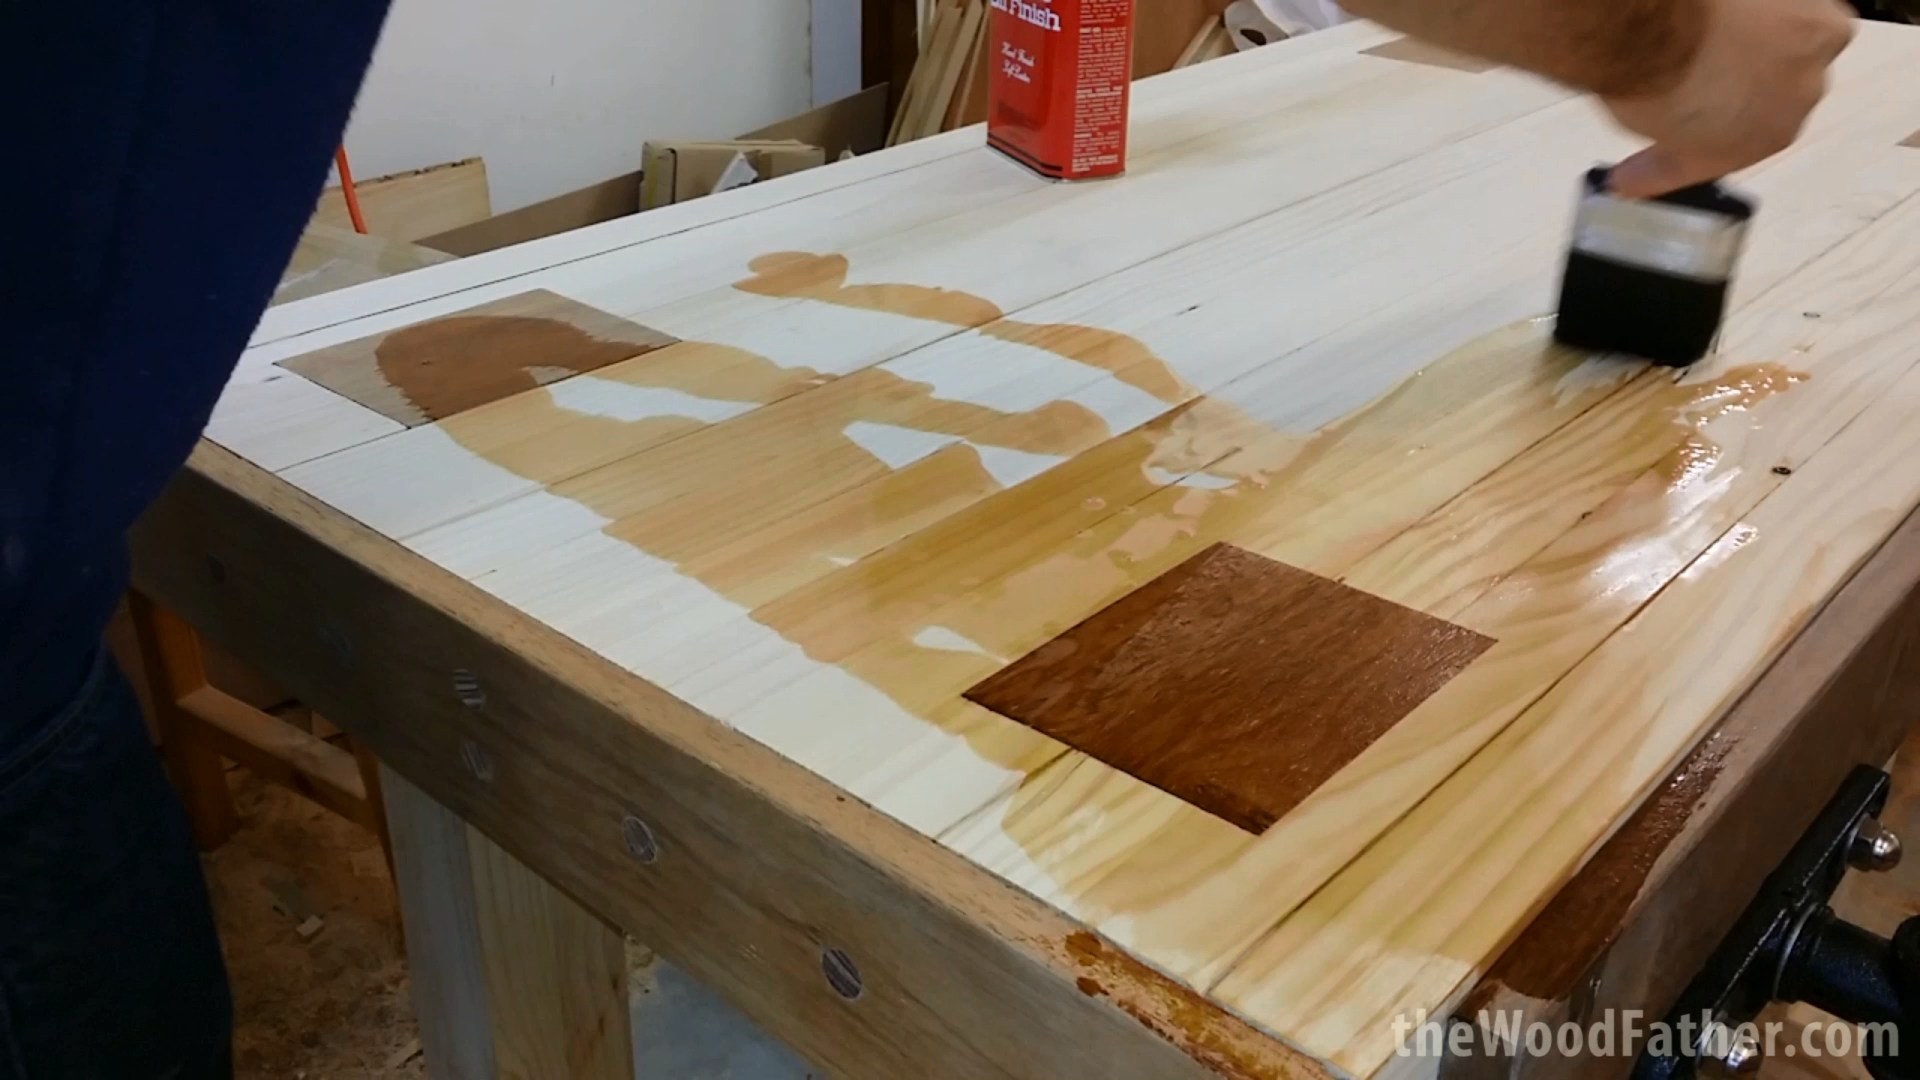
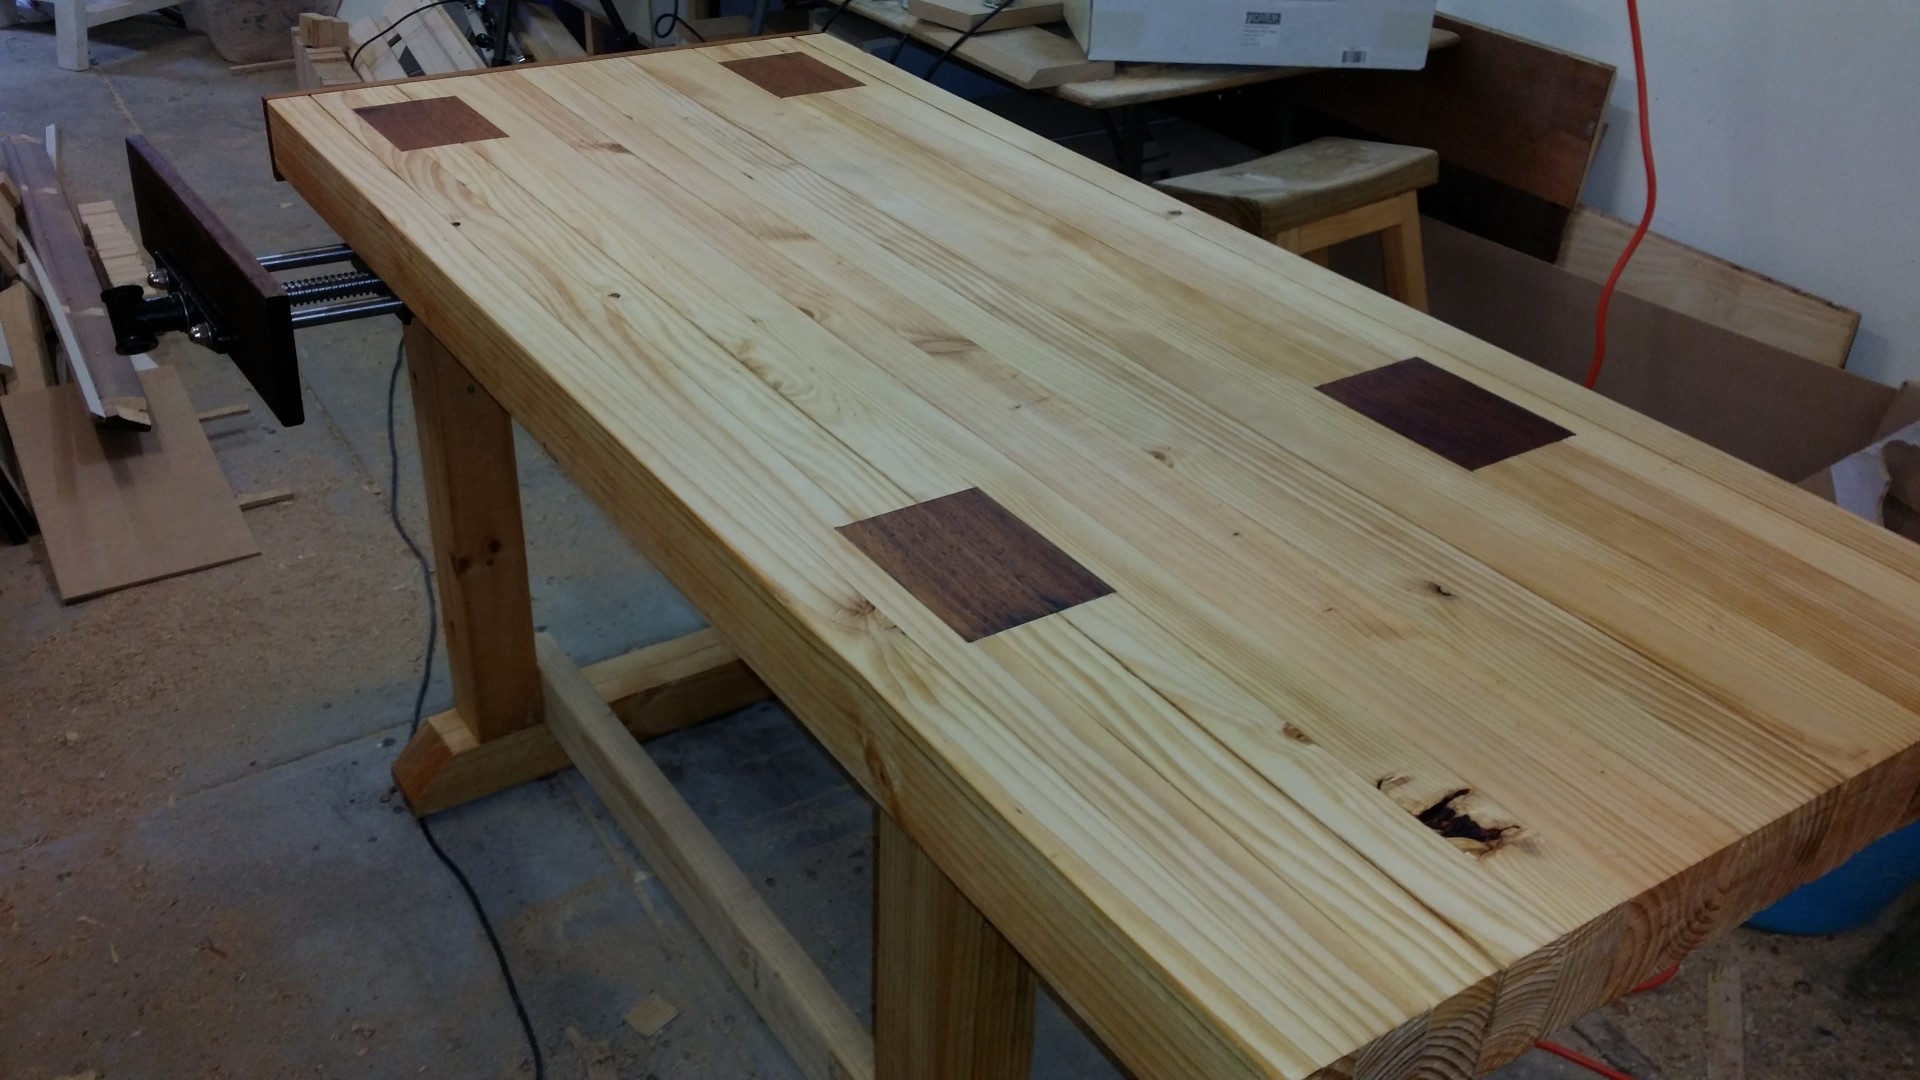
Applying the Finish
On what I did:
 |
 |
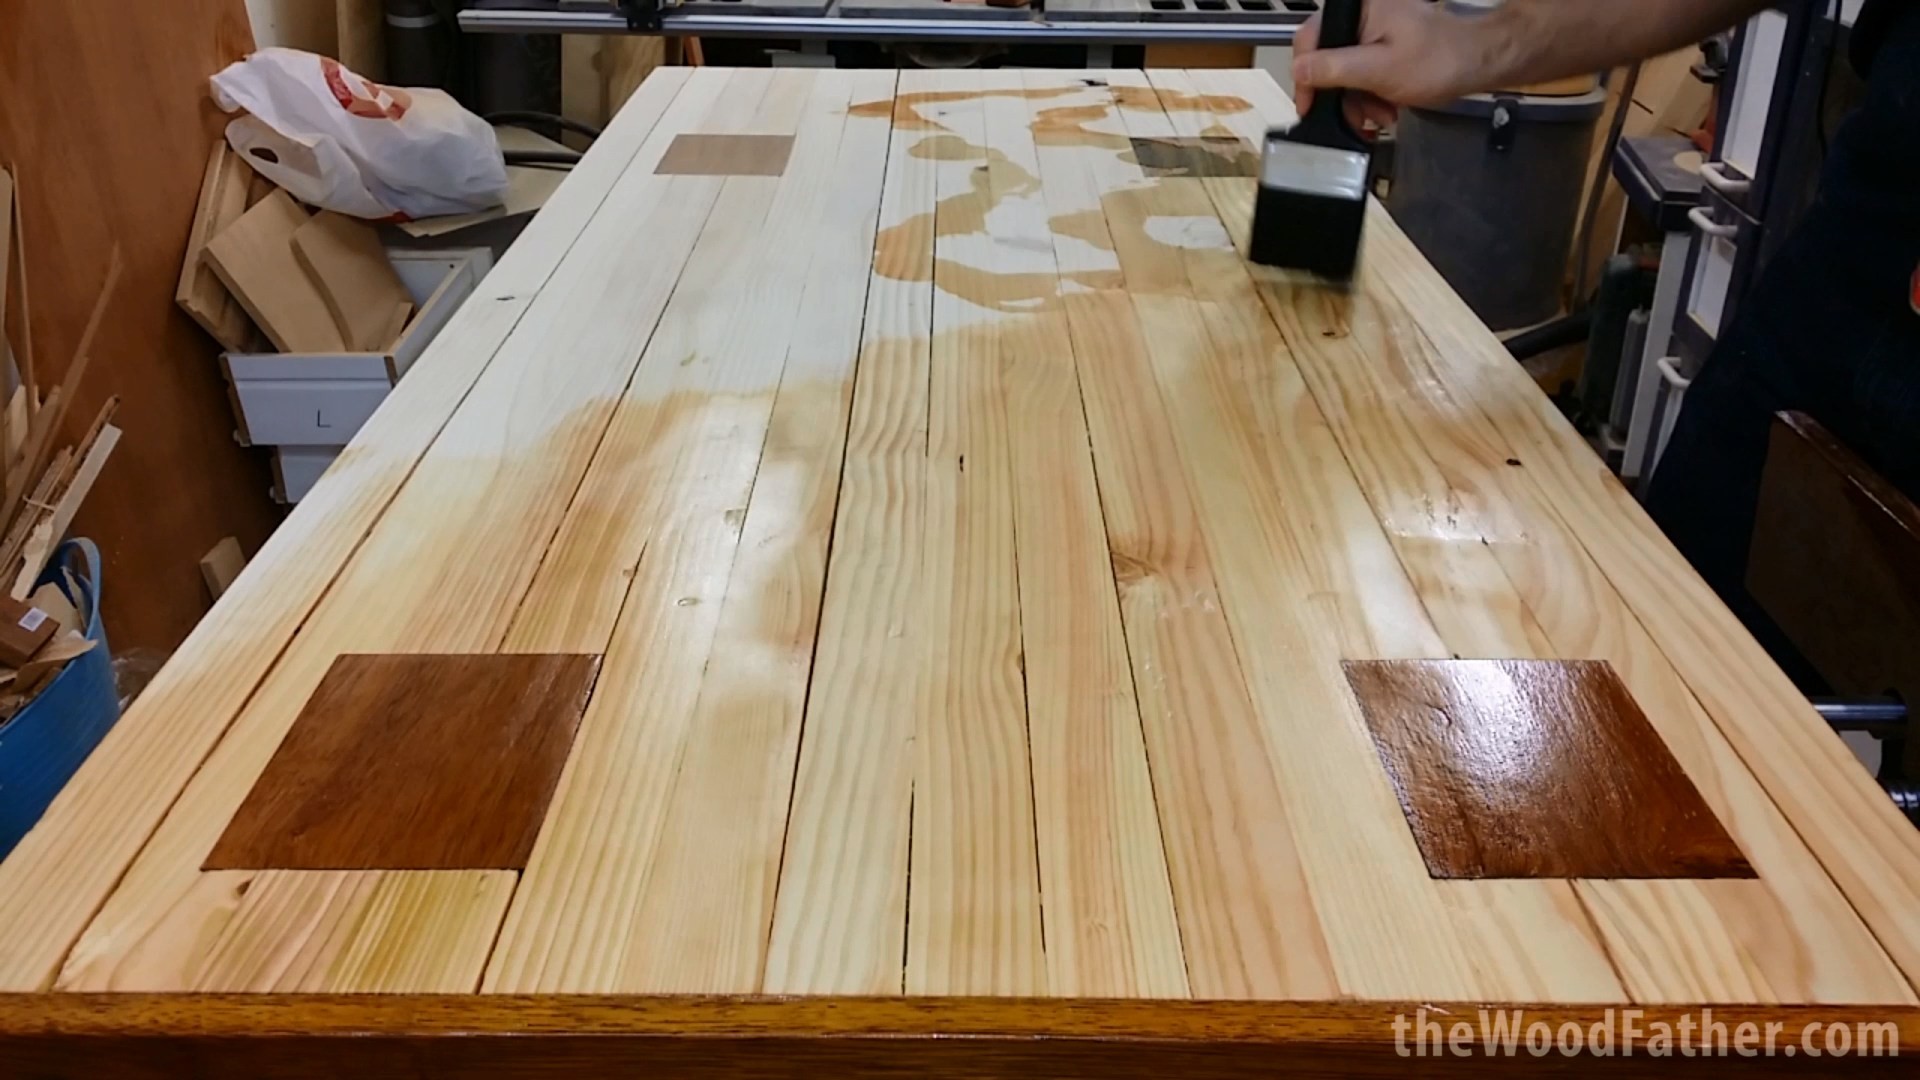 |
I brushed on two generous coats of Minwax Antique Oil Finish. I bought this at the now defunct Masters hardware stores chain; it was near the end of days at the stores and there wasn’t much left on the shelves. I didn’t have high hopes for this finish seeing as I only paid a couple dollars for it, but after a test on some offcuts I was ecstatic.
You know how when you have been waiting for something for a long time, you have a picture in your mind of what it should look like? For me, my mind pictures a light orange tinge on a workbench with dark contrasting sections. And once this oil was applied what did I end up with? Exactly what I had pictured, I honestly couldn’t be happier with the colour that the bench turned out, I think it looks beautiful.
If I was to do it over:
I would buy 3 cans of this oil!
And how does it all look?
Amazing!
 |
 |
 |
 |
 |
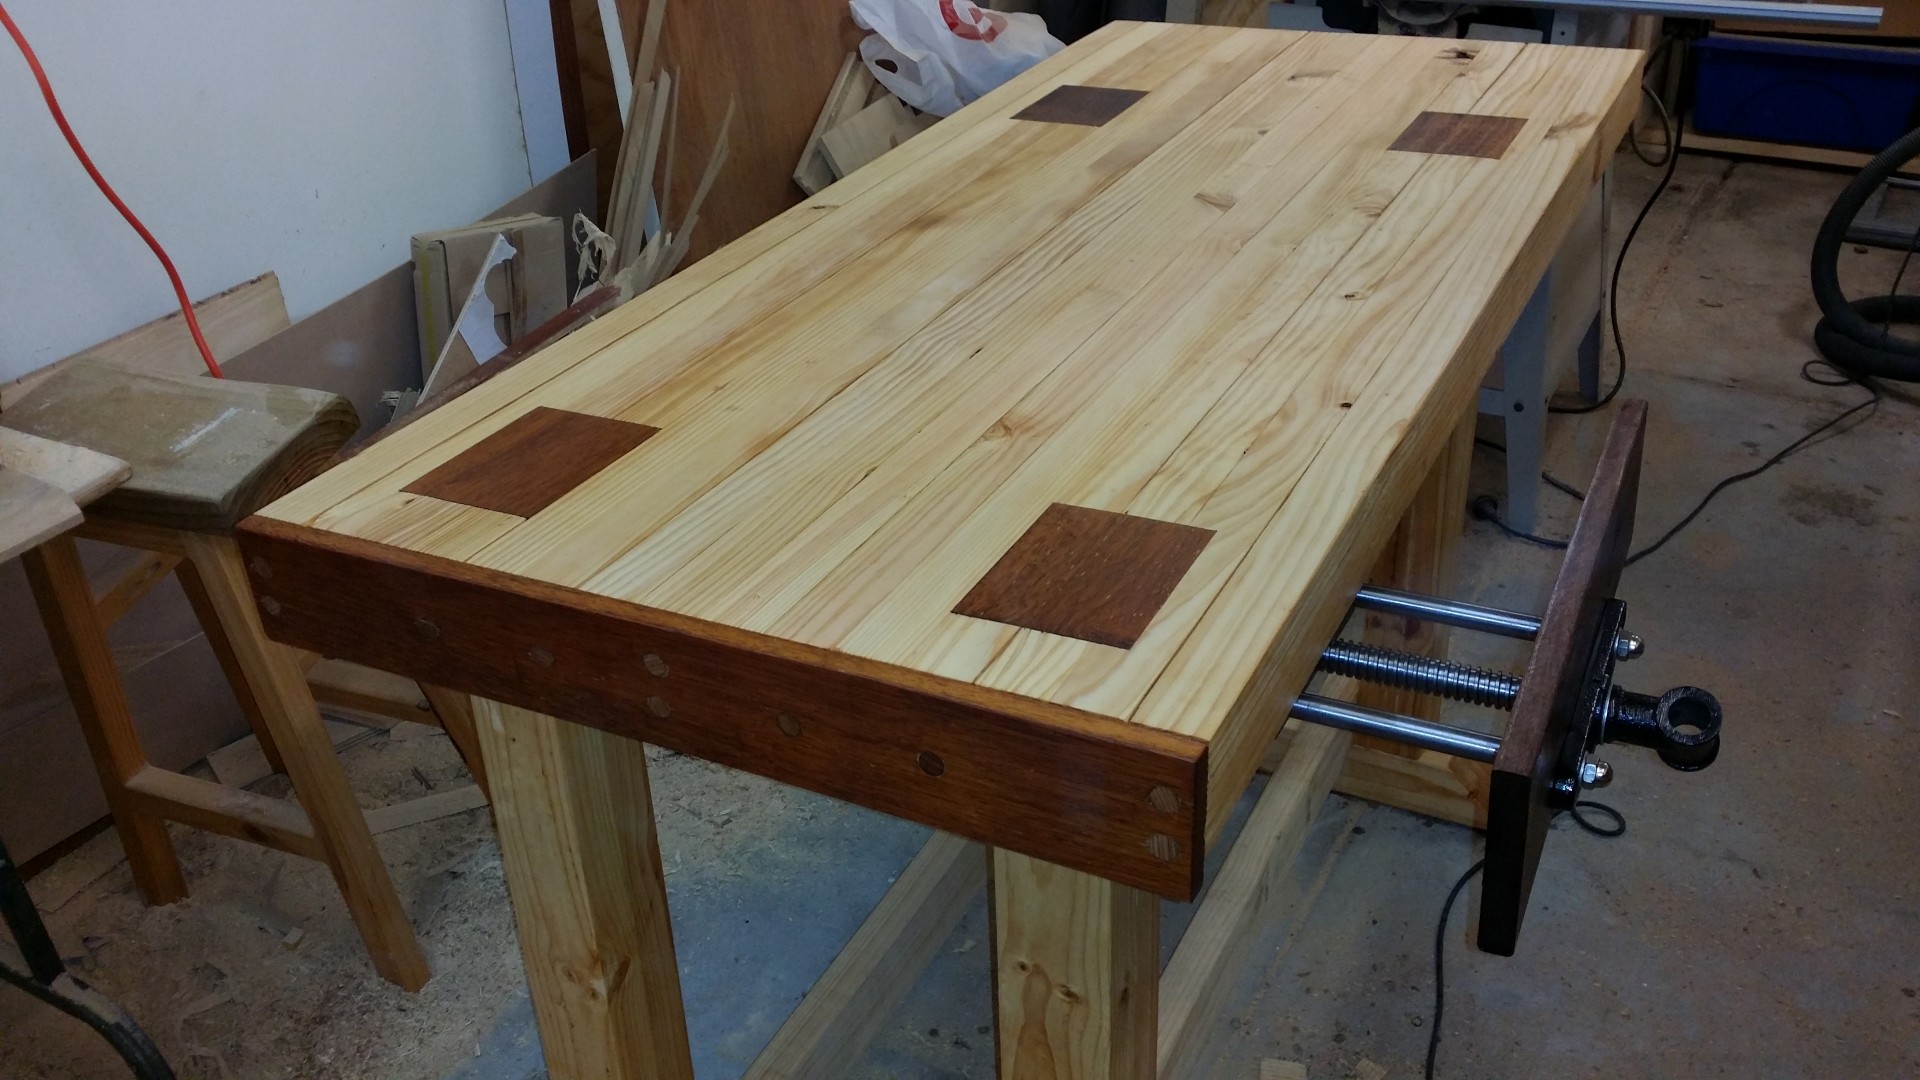 |
I couldn’t be happier with this bench, to me it is amazing. There are always improvements to be made but they will come in time. Dogholes one day, maybe an end vice, definitely shelving underneath it. It will evolve over time and I bet it lasts me 10+ years.
For now I’ll stop talking about my bench now and start using it to build things, but if you have any thoughts, comment below.
Ifound this on lumberjocks and am inspired to make this styke bench for myself. Your way of showing what you might have done differently helps someone like myself who is an aspiring weekend woodworker.
Great to hear, thanks Jesse. When I see other people build projects I tend to try to think of one or two ways that I could emulate it, as I generally don’t have all the required tools. I thought it might be fun to show what worked for me, and what I’d do better next time. Fortunately next time is a long way off, this bench should last me a fair while yet.
Comments are closed.